Getting Started
Start Here
Welcome to SkilFreek, the app to create, discover and share procedures! Before you start using this incredible productivity tool, there are some concepts for you to learn.
Concepts
Users are people that have accounts with SkilFreek. Congratulations, you're a SkilFreek user!

Groups are a collection of people who are related by interest, organization or business. "Me, myself and I" is a group for creating and saving your personal procedures.

Procedures are step-by-step tasks with text and photos. Procedures are created and owned by groups.

Assignments are the procedures you assign to a user for a specific day and time. SkilFreek allows you to track assignments given and received.

Roles: A SkilFreek user can be a member or an admin of a group. Members can only view the group's procedures, whereas admins can view and modify the procedures.

Sign Up
Using SkilFreek is easy! Start by creating an account with a valid email address and a password.
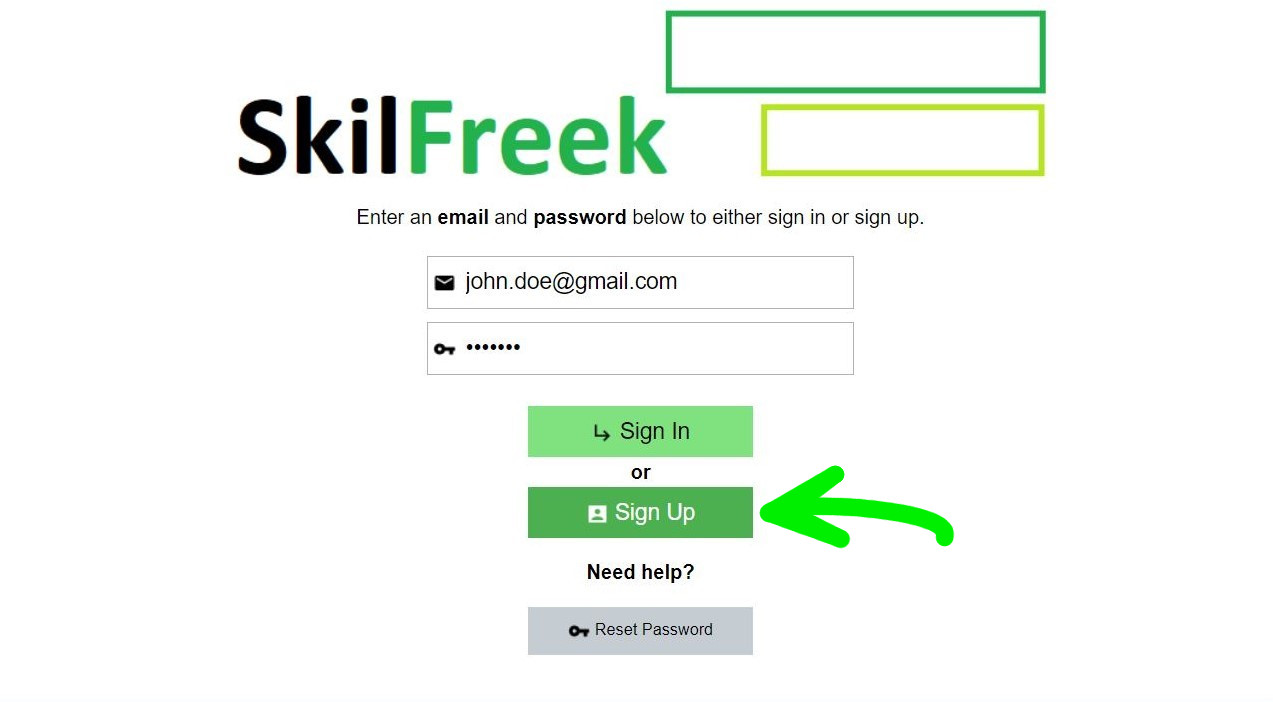
Step 1. Enter your email address and password
Enter your email address and a secure password. Click Sign Up.
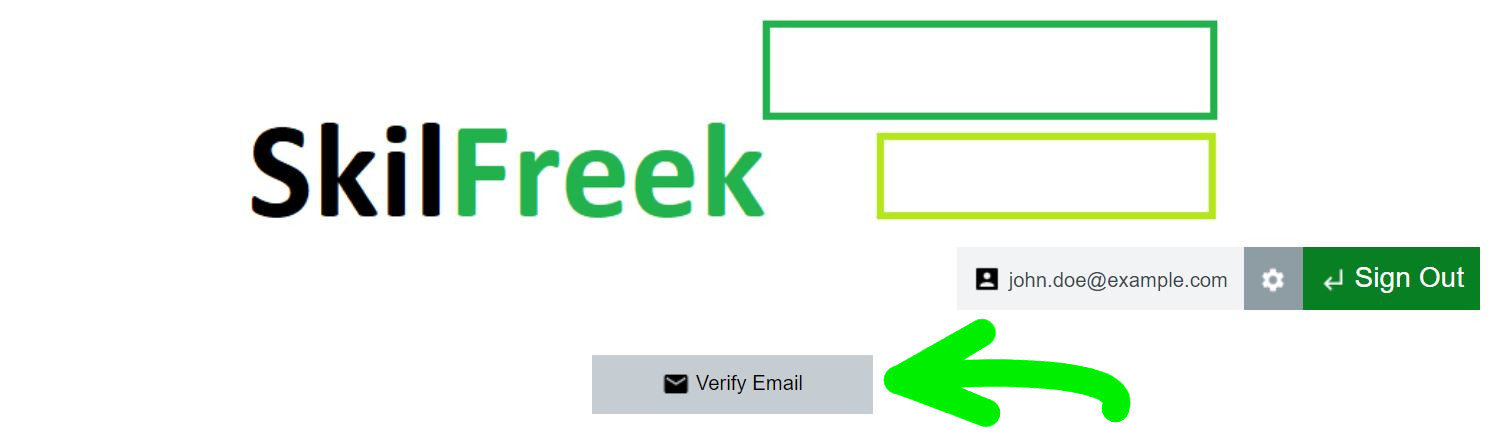
Step 2. Verify your email
Click Verify Email to proceed with the email verification.
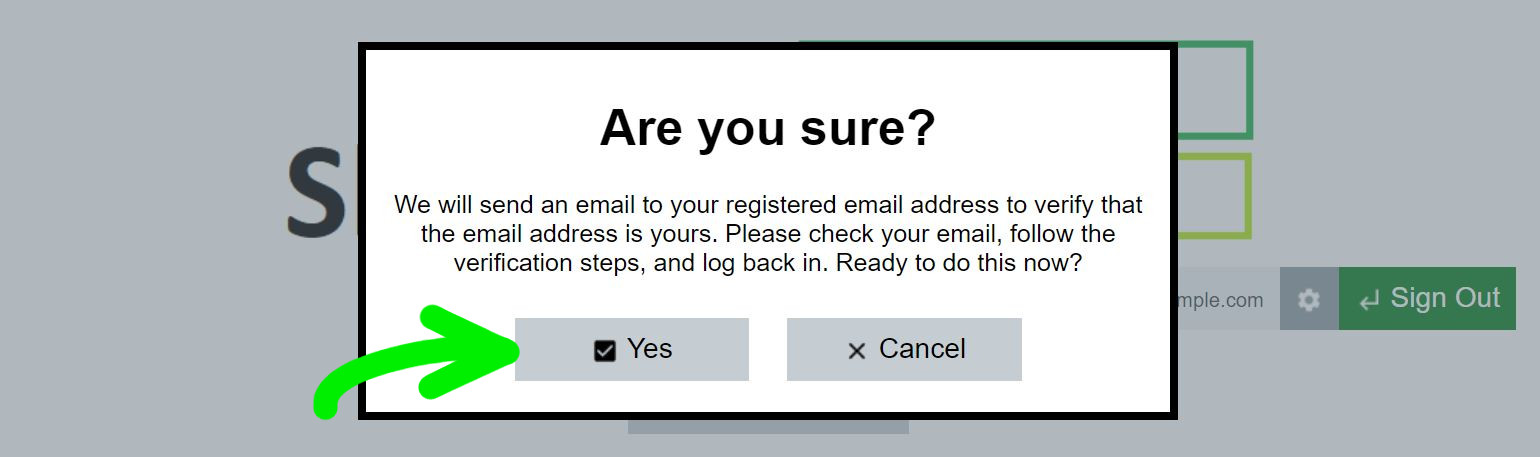
Step 3. Proceed with email verification
Click Yes to proceed with the email verification.
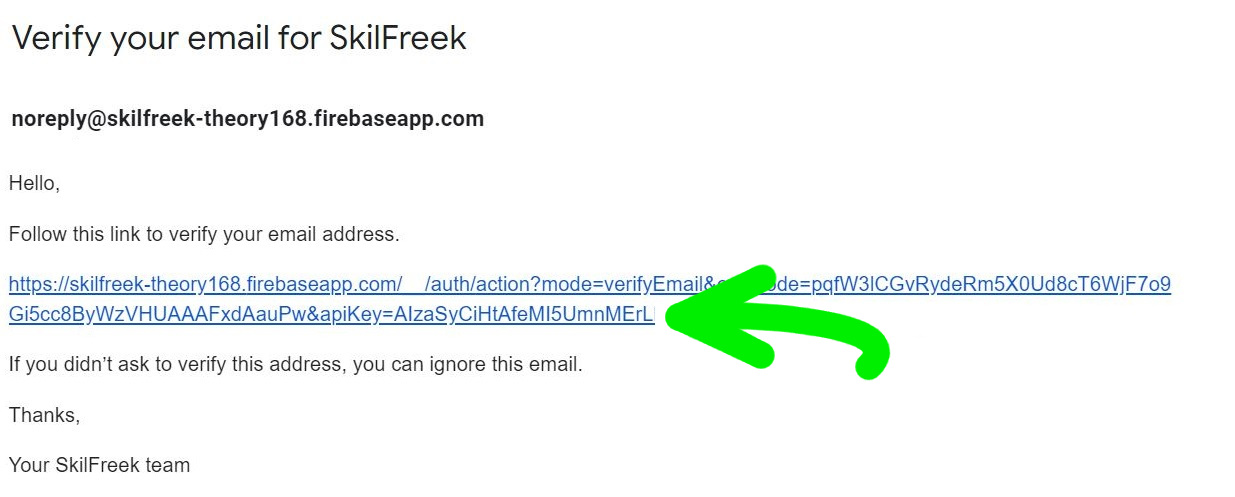
Step 4. Check your email for a SkilFreek email verification
Check your inbox for a Skilfreek verification email. Follow the link in the body of the email to verify your email addess.
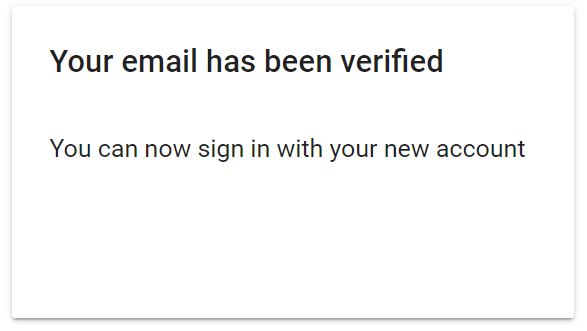
Step 5. Confirmation
Once your email has been verified, a confirmation message will be shown.
Sign In
After your SkilFreek account has been successfully created and confirmed, sign in using the SkilFreek website or mobile app.
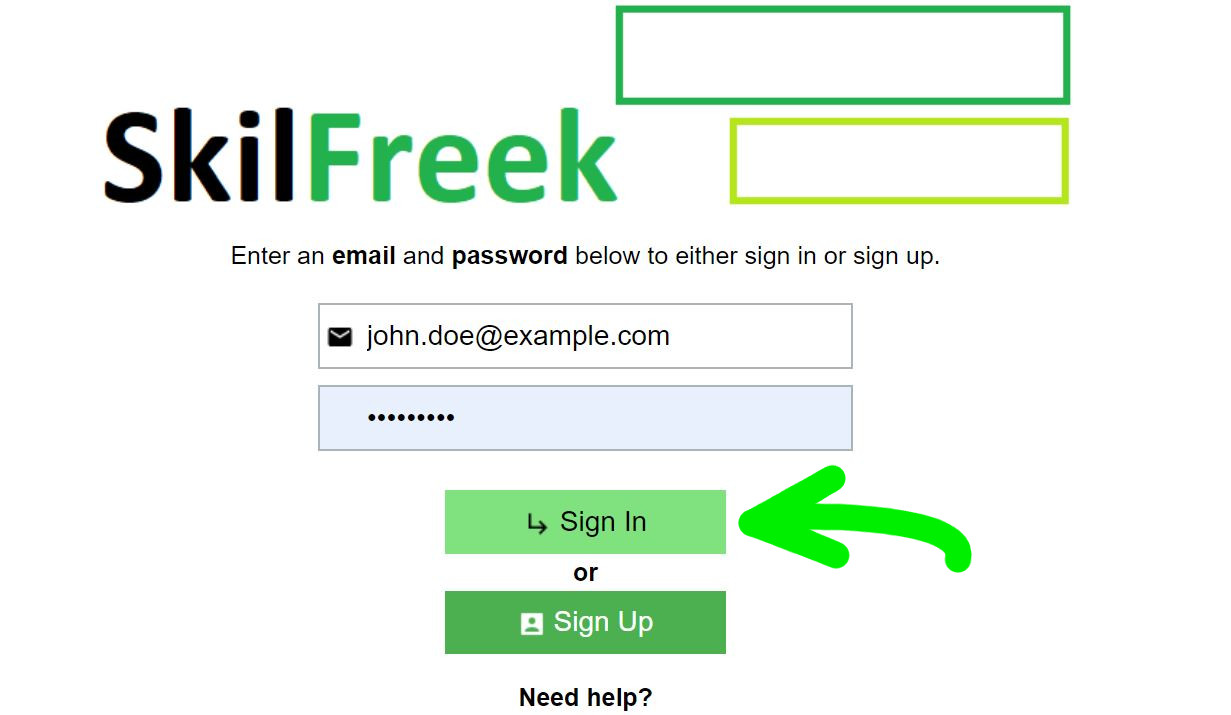
Step 1. Enter your email address and password
Enter your email address and password. Click Sign In.
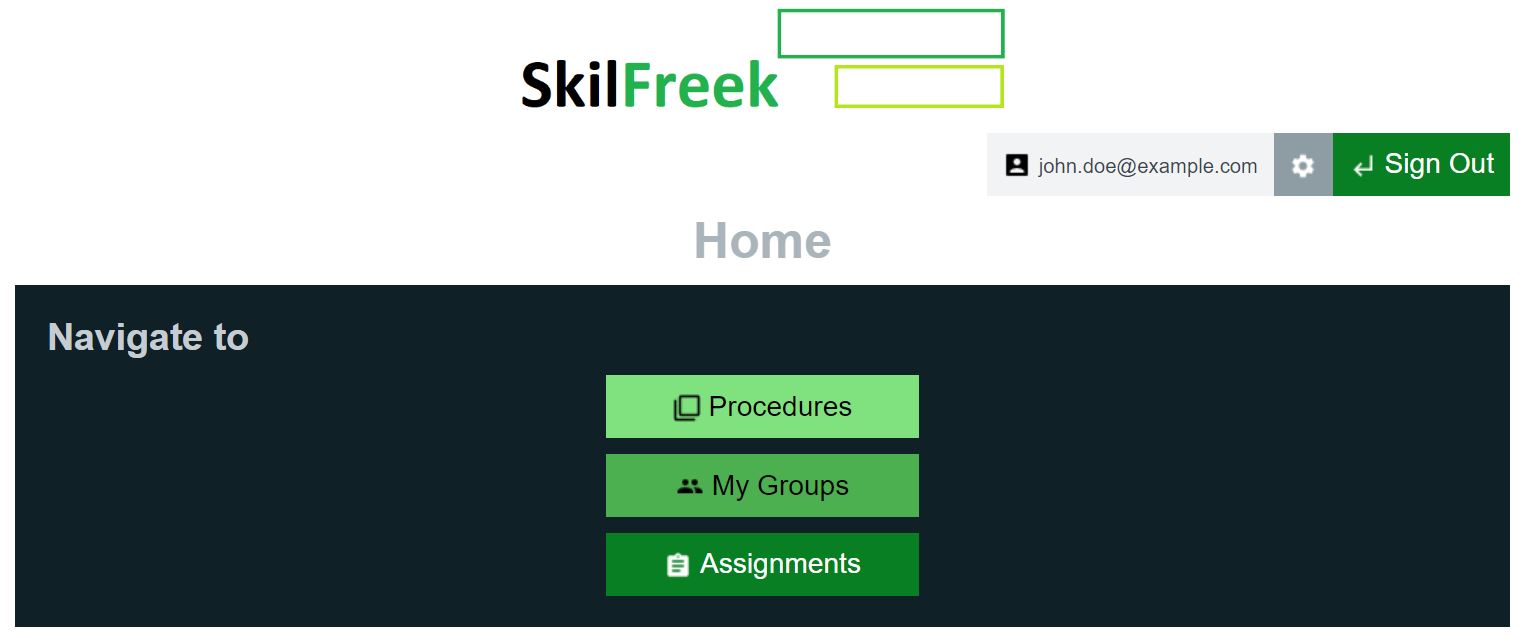
Step 2. Enter SkilFreek
After you are signed in to your account, you will be able to access SkilFreek and discover a world of productivity.
Create a Procedure
If you're ready to get productive, this is where to start. Document important tasks to remember for the future or to share with other users by creating step-by-step instructions.
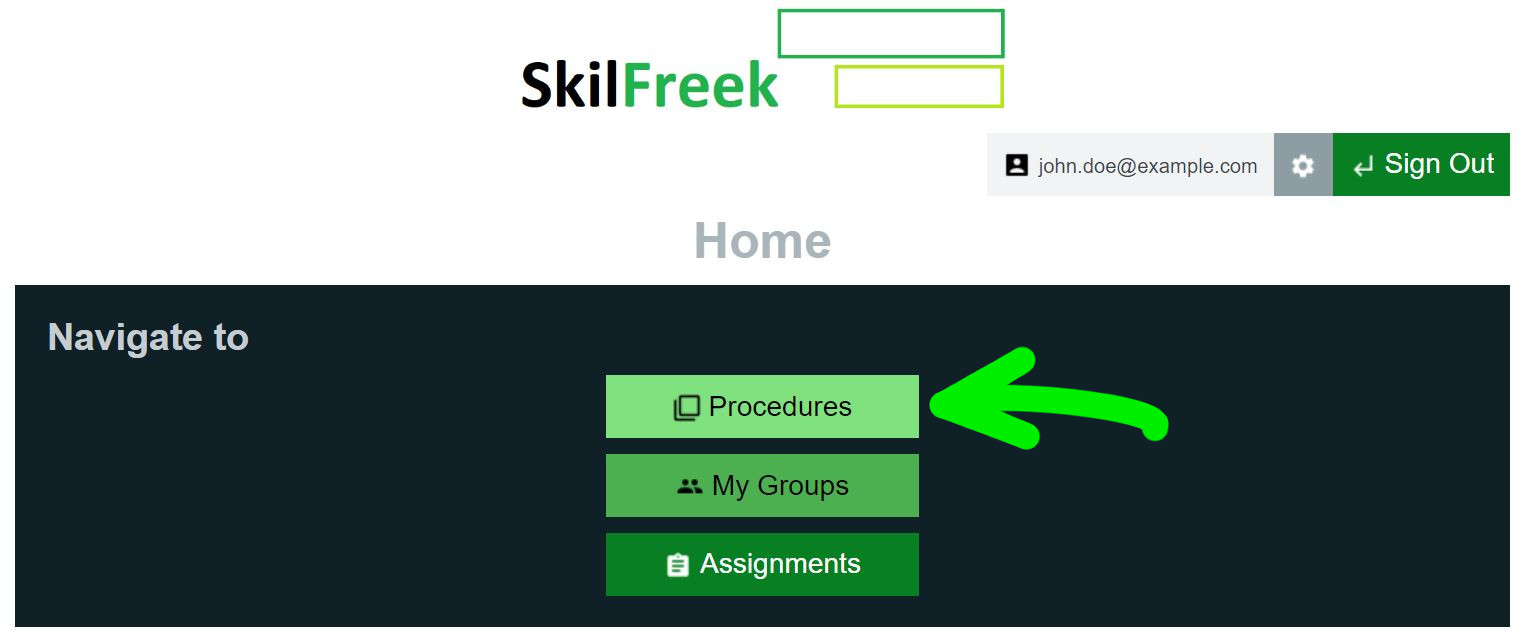
Step 1. Procedures
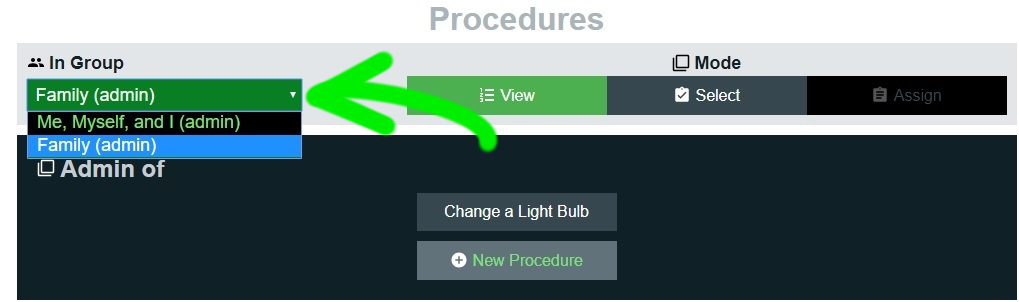
From the Home page, go to Procedures.
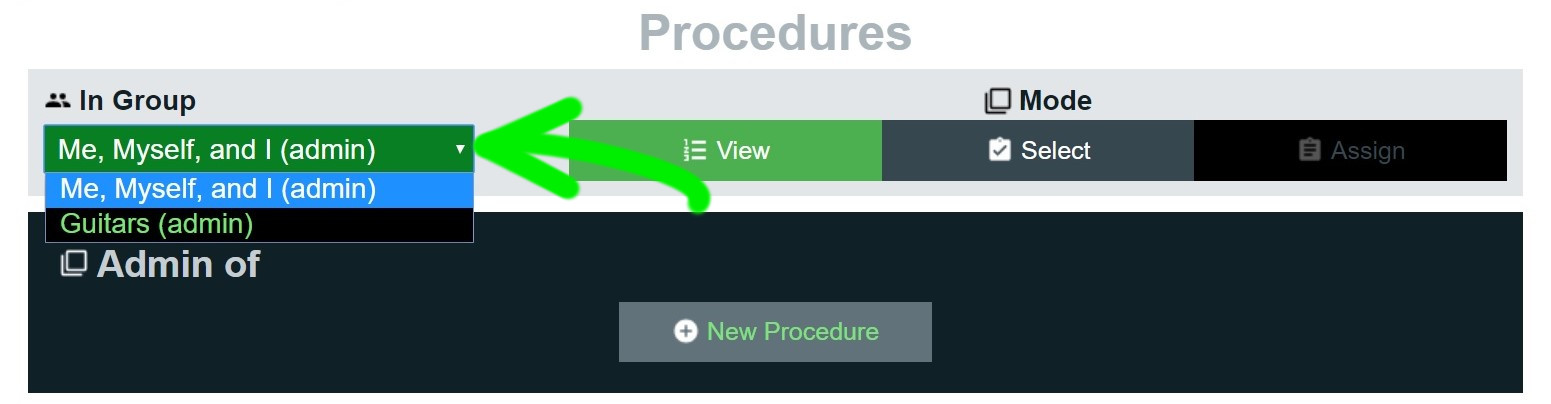
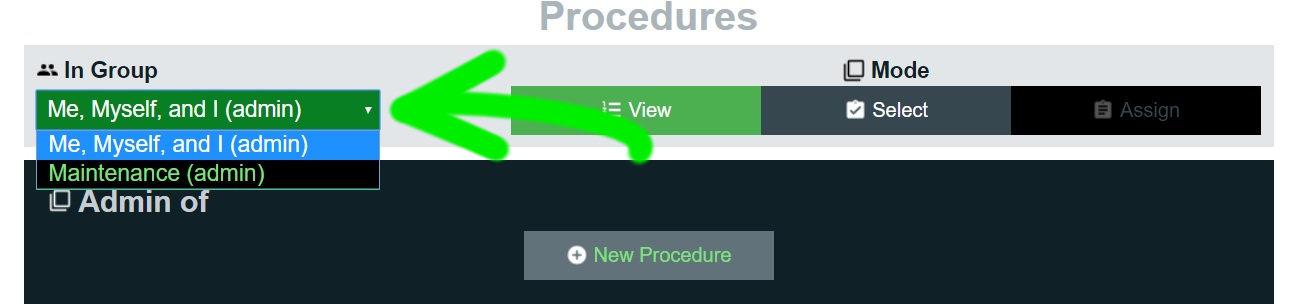
Step 2. Select a group
Select the In Group list. From this list, select the group in which you want to create a procedure.
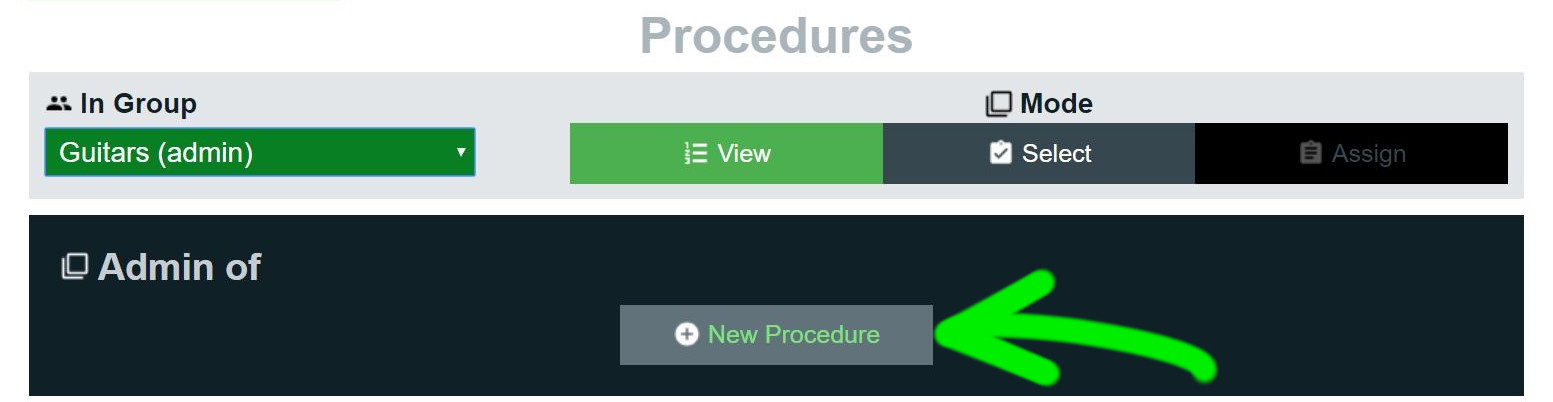
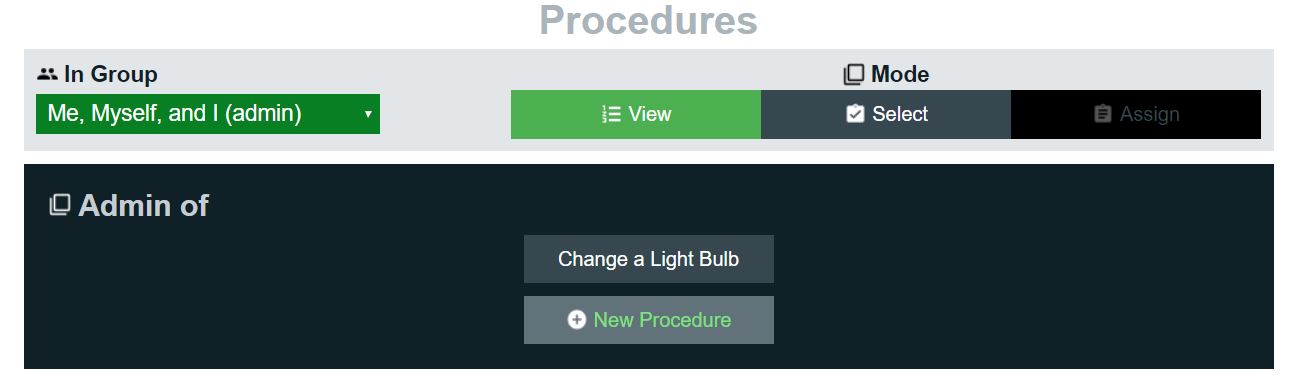
Step 3. Create a new procedure
To start creating a new procedure, click New Procedure.
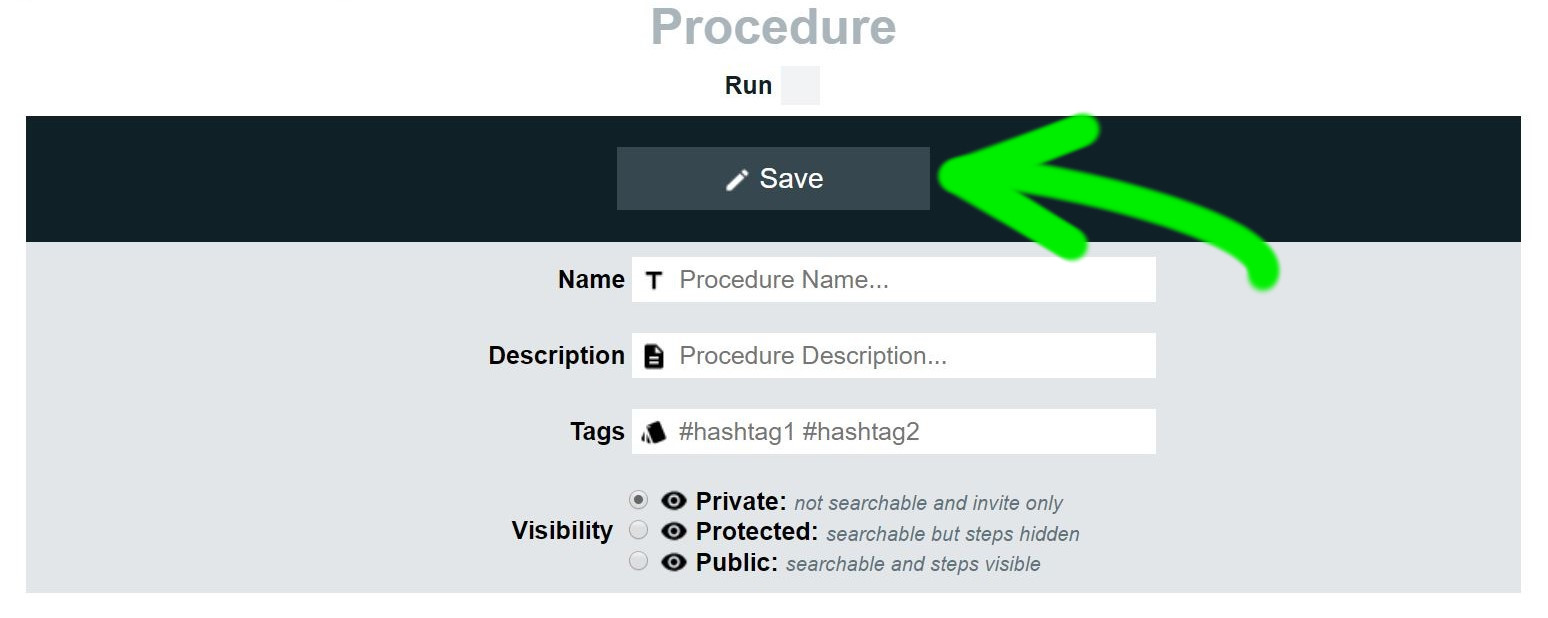
Step 4. Fill in the new procedure information
Give your new procedure a name, description, tags and visibility. Click Save.
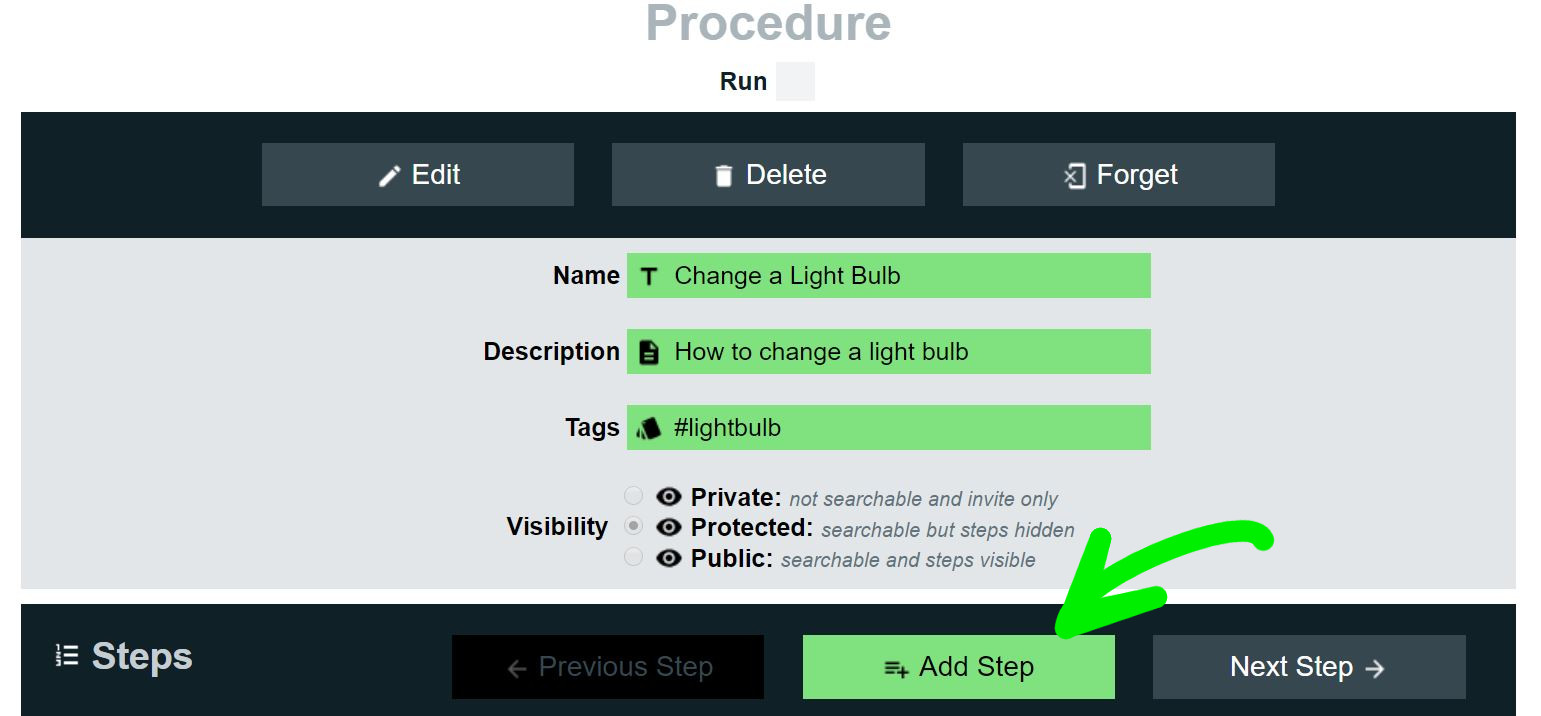
Step 5. Add steps to your procedure
After you have saved your procedure, scroll down and click Add Step.
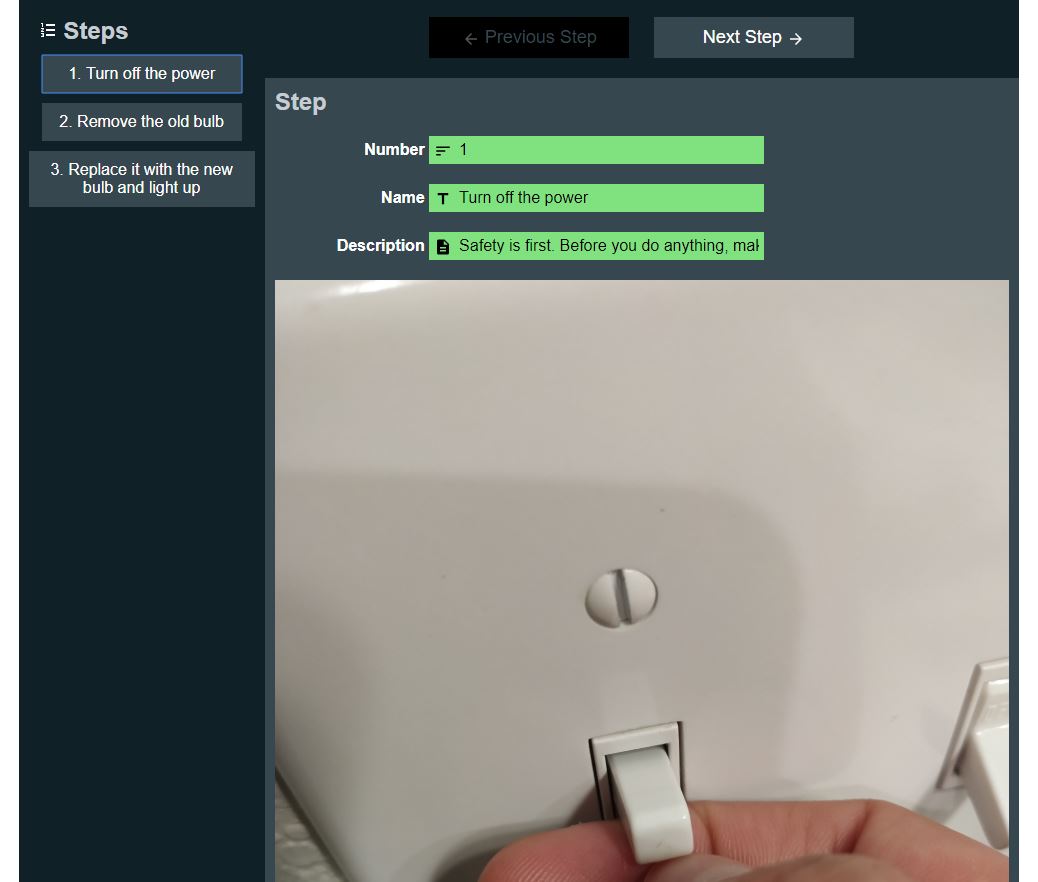
Step 6. Fill in the step information
Add a name and a description to the first step of the procedure.

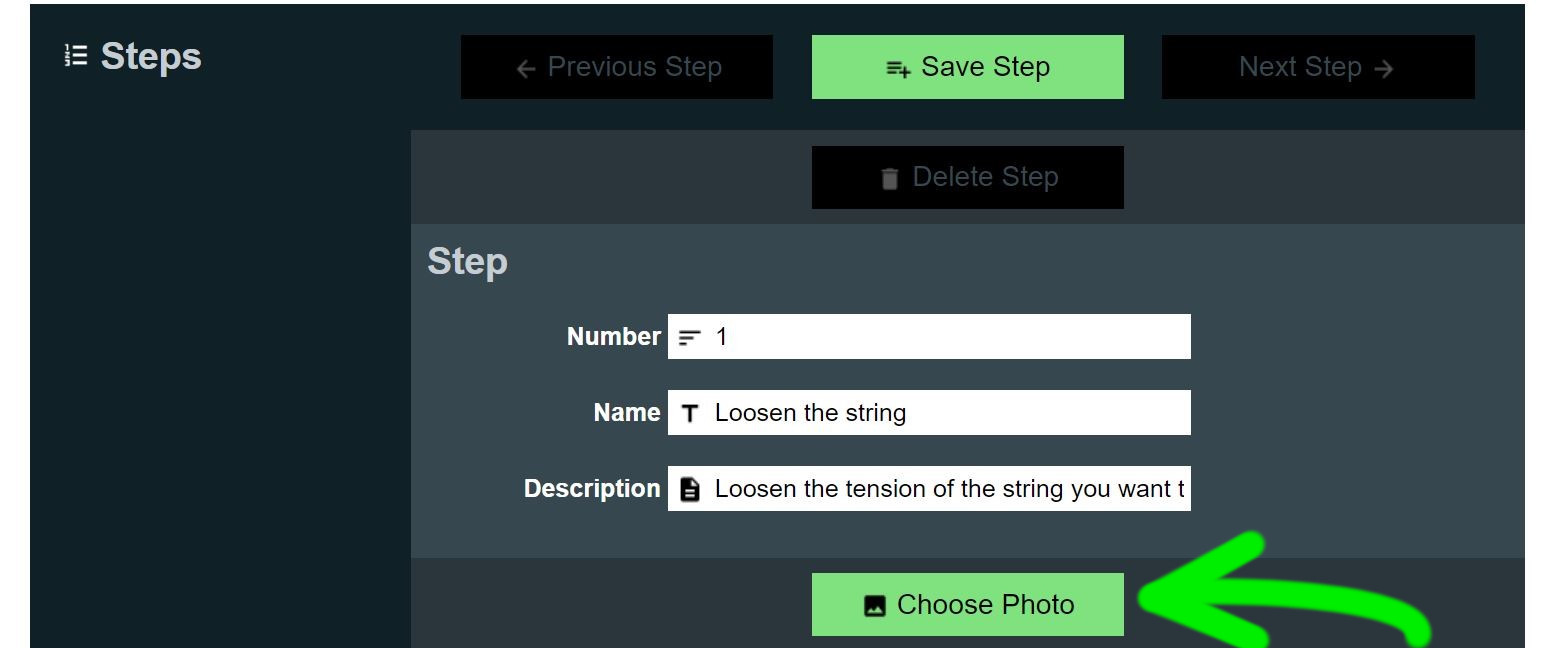
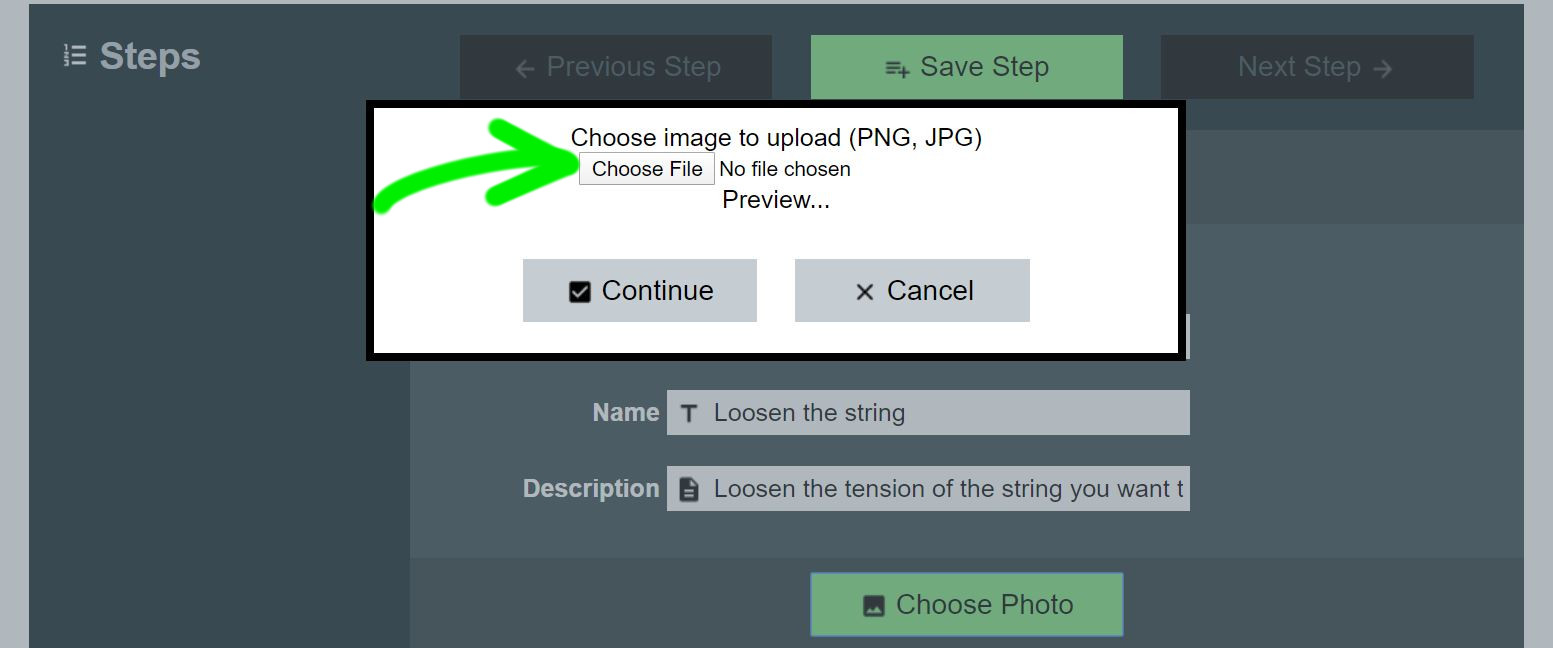
Step 7. Choose a photo
To add a photo to your step, click Choose Photo. Then, click Choose File.
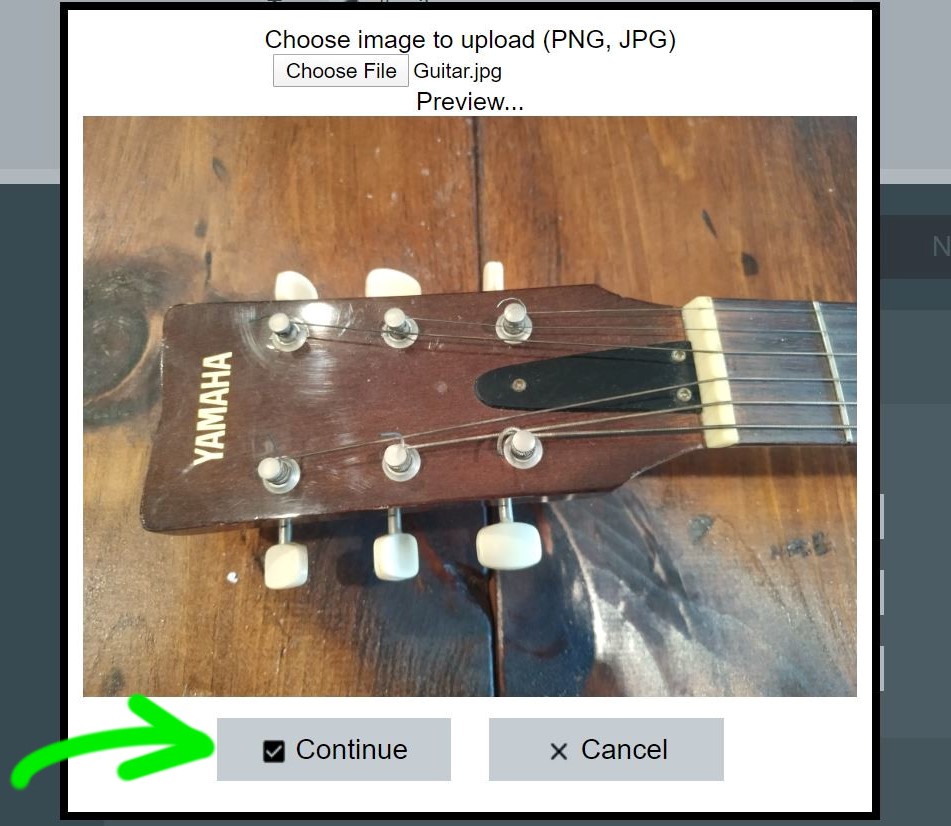
Step 8. Confirm the photo
After you have selected the correct picture, click Continue.
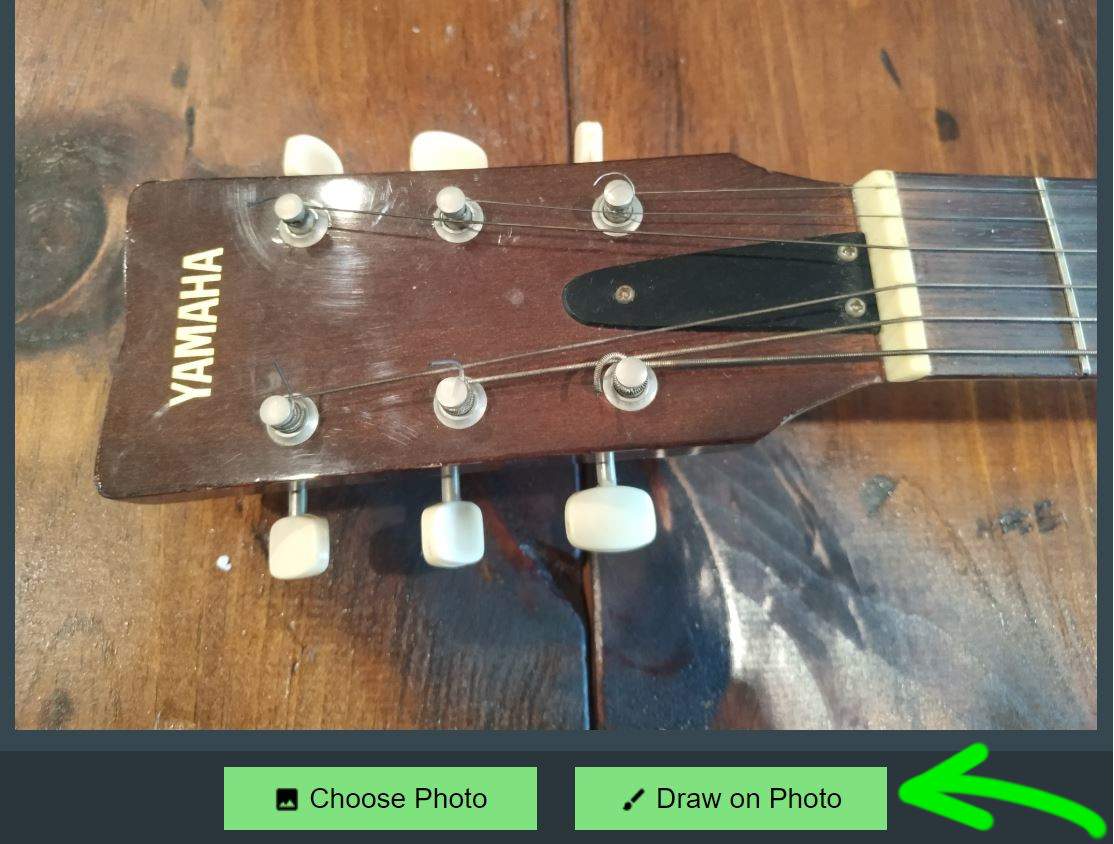
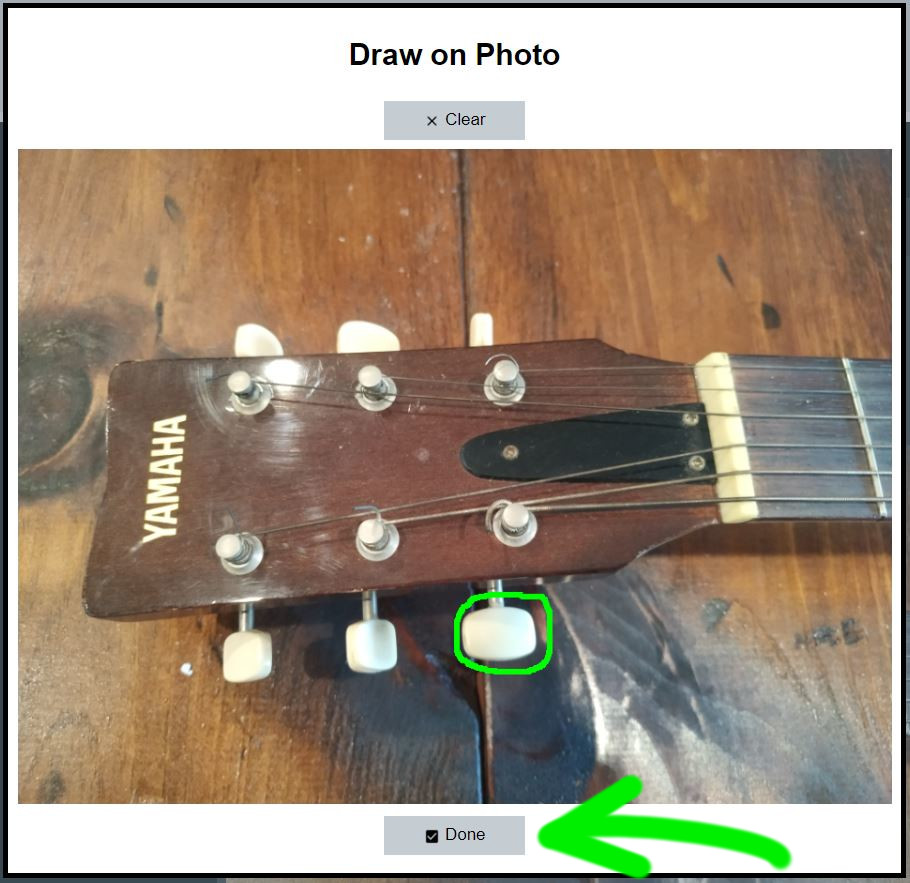
Step 9. Draw on photo
To highlight what's important in your picture, click Draw on Picture. Then, click Done.
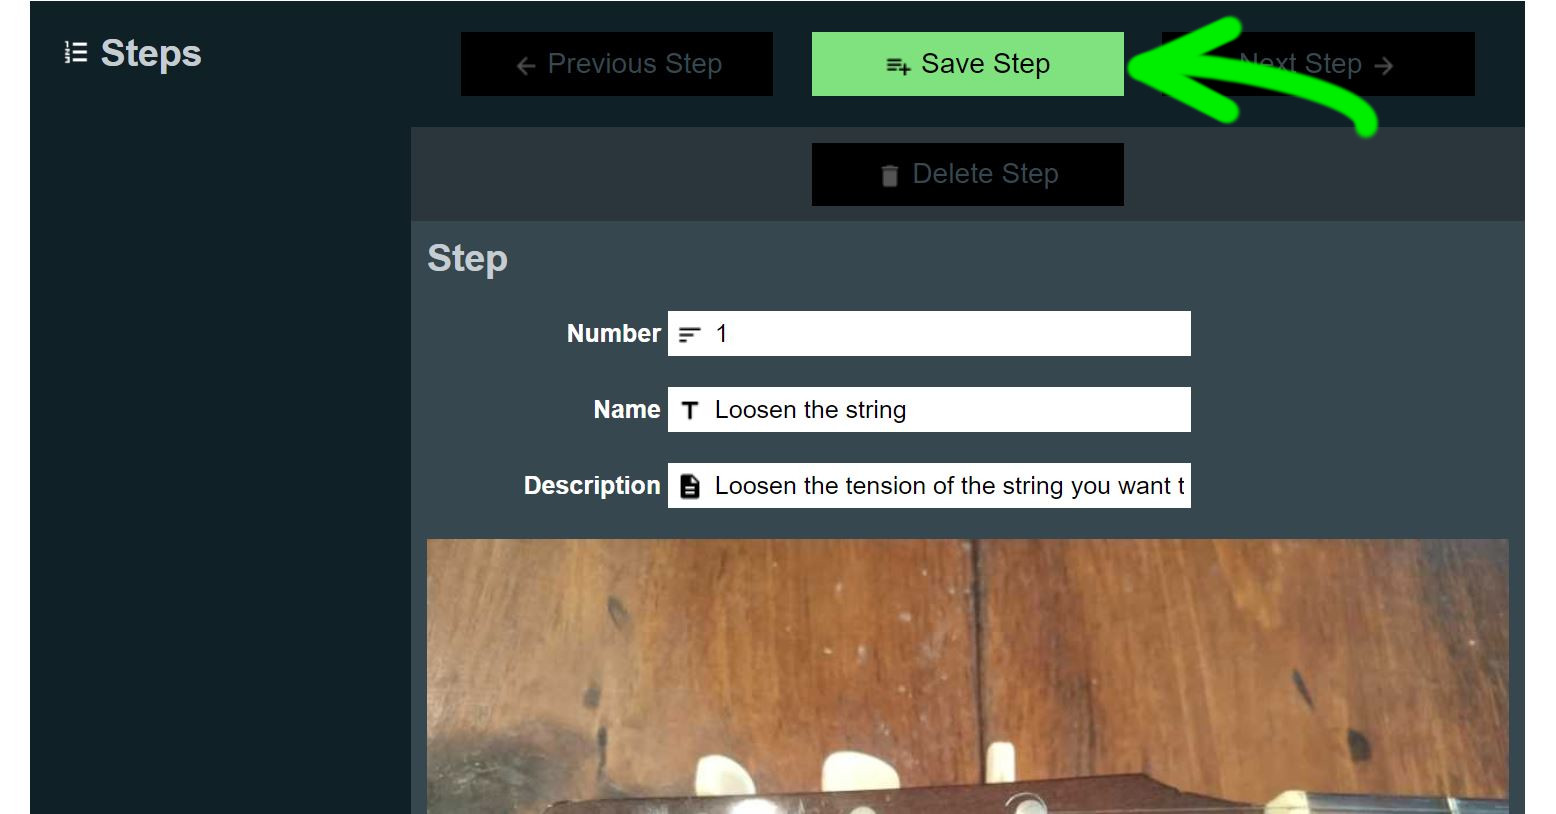
Step 10. Save your step
After you have added a name, description and a photo, click Save Step.
Step 11. Repeat steps 5 through 10
Repeat steps 5 through 10 until all steps in your procedure are complete.
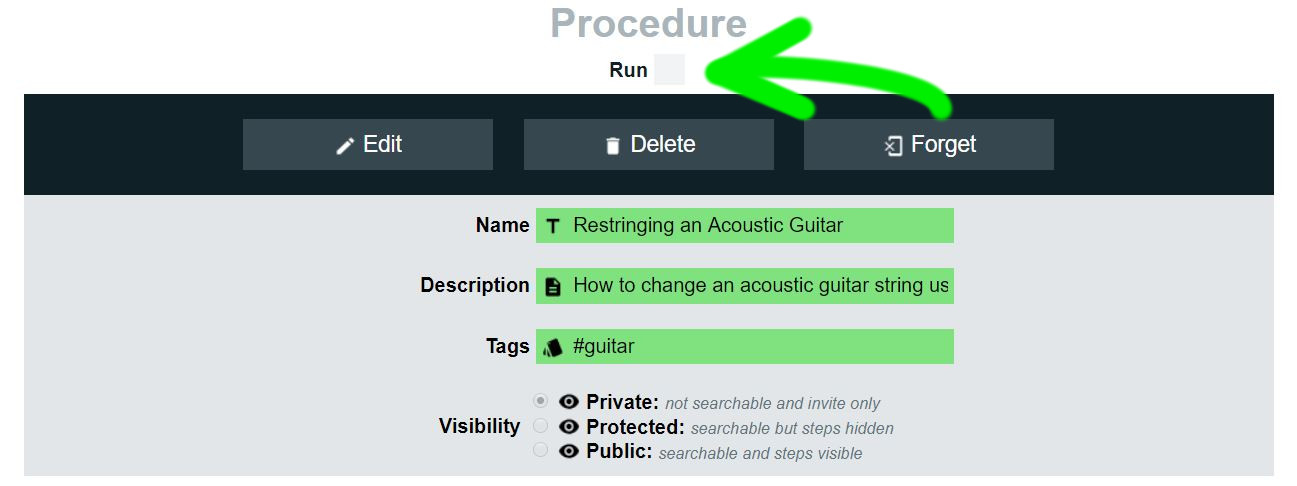
Step 12. Run your procedure
To try out your procedure, click Run. Now you are ready to share skills on SkilFreek!

Find a Procedure
Looking to gain new and unique skills? Discover procedures of your interest by using our tags search system.
Step 1. Procedure
From the Home page, go to Procedures.
Step 2. Select a group
On the Procedures page, select the group from which you want to search for procedures.
Step 3. Find More
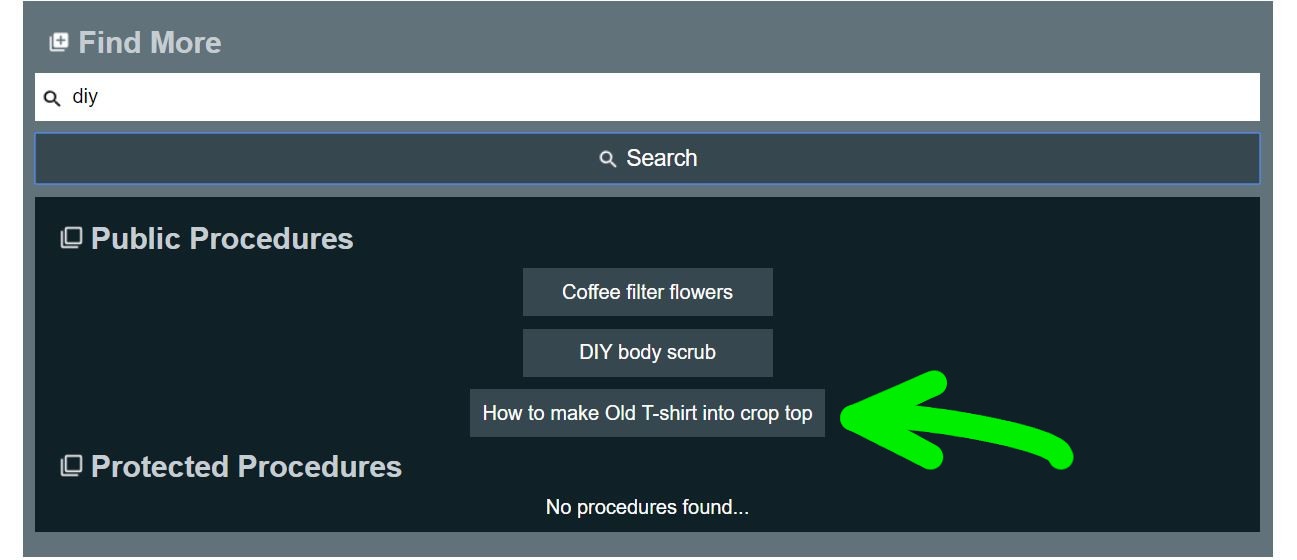
Scroll to the bottom of the page to Find More area and type tags you are interested on. Then, click Search.

Step 4. Select a procedure: Public Procedures
Select the procedure you want to view.
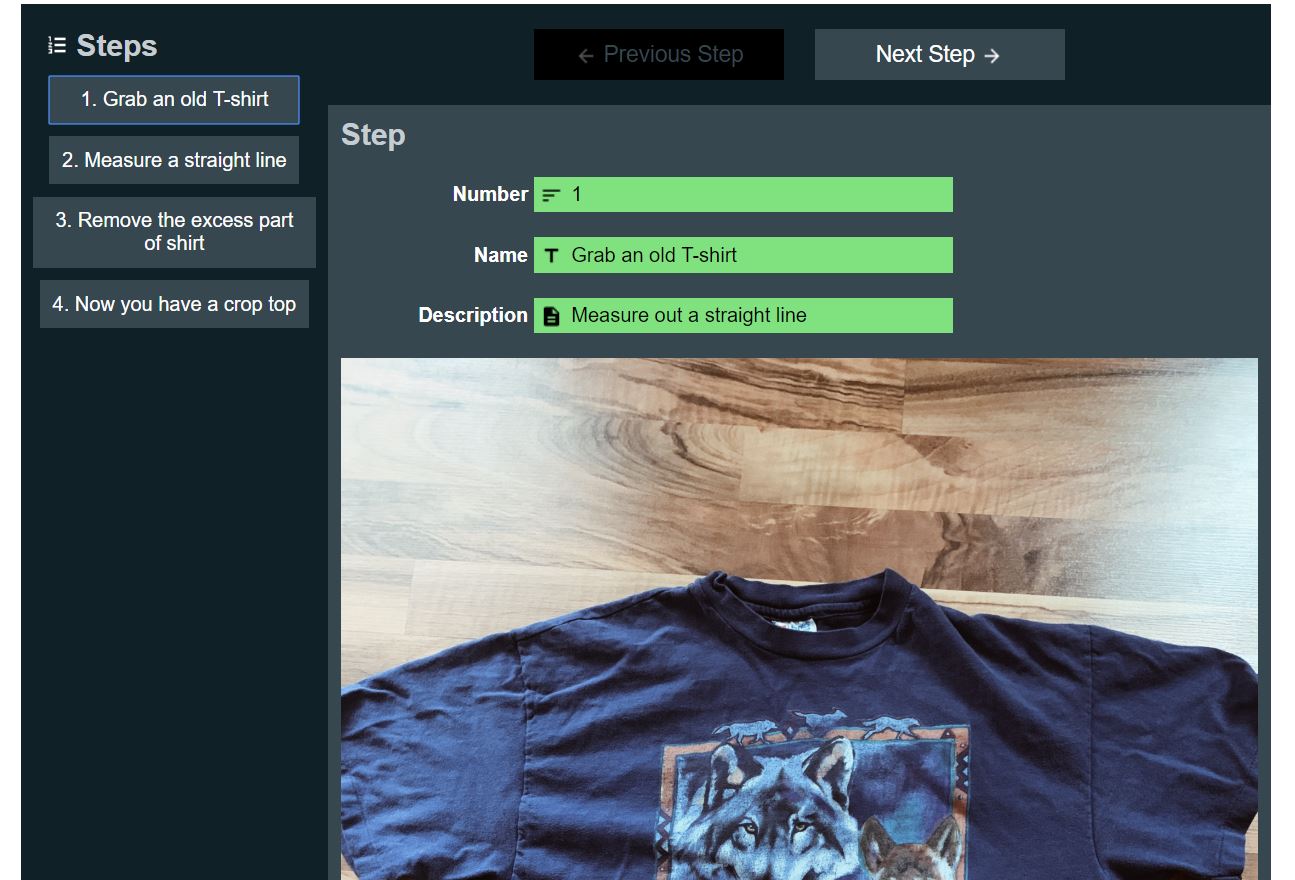
Step 4.1. Public procedure
Enjoy the public procedure!
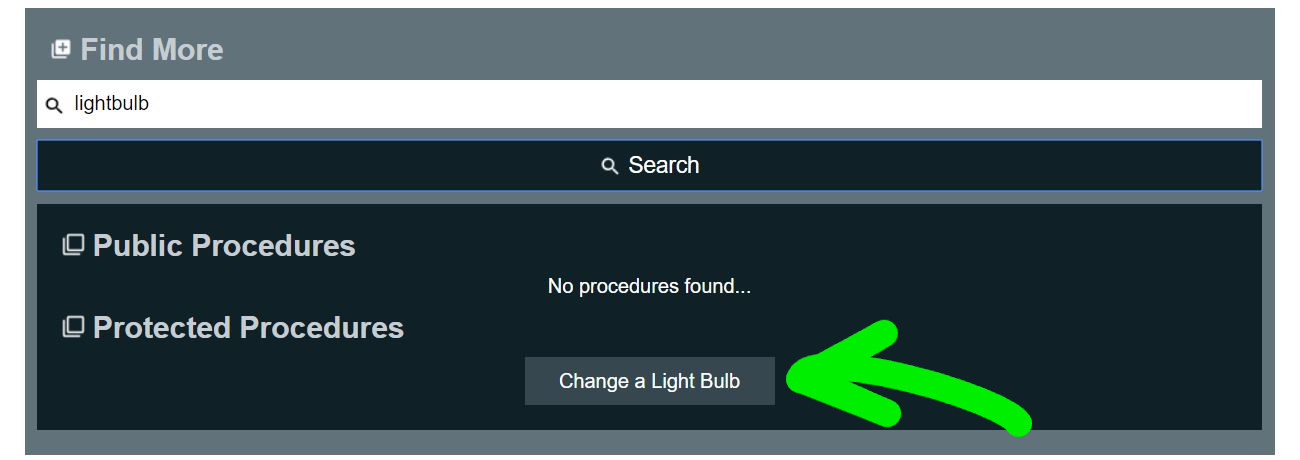
Step 5. Select a procedure: Protected Procedures
Select the protected procedure you want to view.
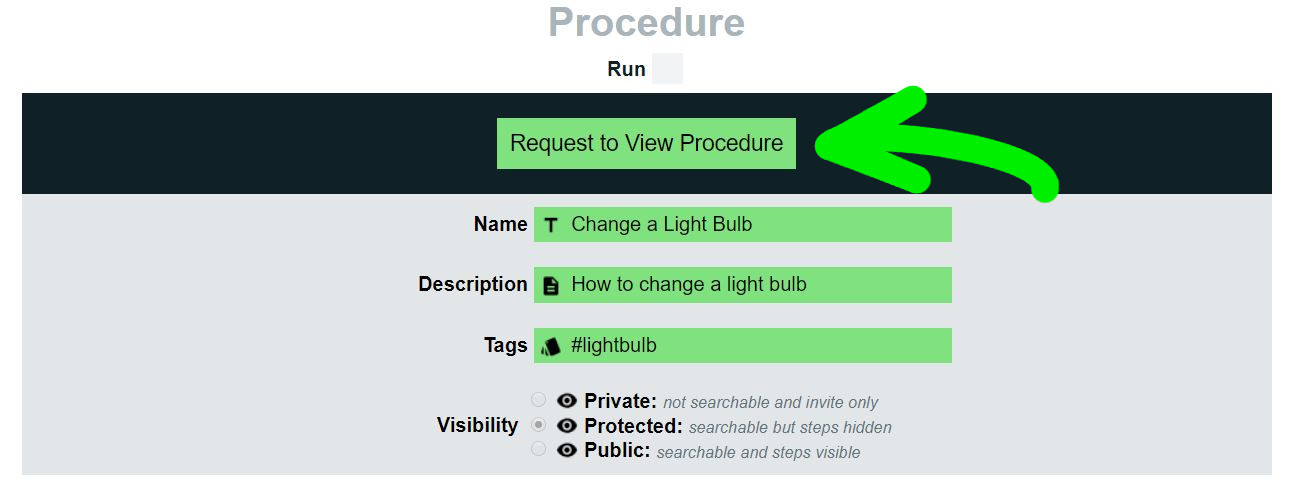
Step 5.1. Select a procedure: Protected Procedures
Click Request to View Procedure.
Step 5.2. Status of request
The procedure's admin needs to accept your request. Once your request is accepted, the procedure will be move from Requested to view to Viewer of.


Step 5.3. Protected procedure
Enjoy your protected procedure!
Invite a Group to your Procedure
To share skills with others, you can invite a group to follow your step-by-step procedure.
Step 1. Procedures
From the Home page, go to Procedures.
Step 2. Select a group
From the In Group list, select the group that contains the procedure.
Step 3. Uncheck the Run box
Uncheck the Run box to allow for sharing the procedure.

Step 4. Go to Invite Group
Scroll down to the Invite Group area.

Step 5. Enter the group name
Enter the group name with which you want to share your procedure. Then, click Search .

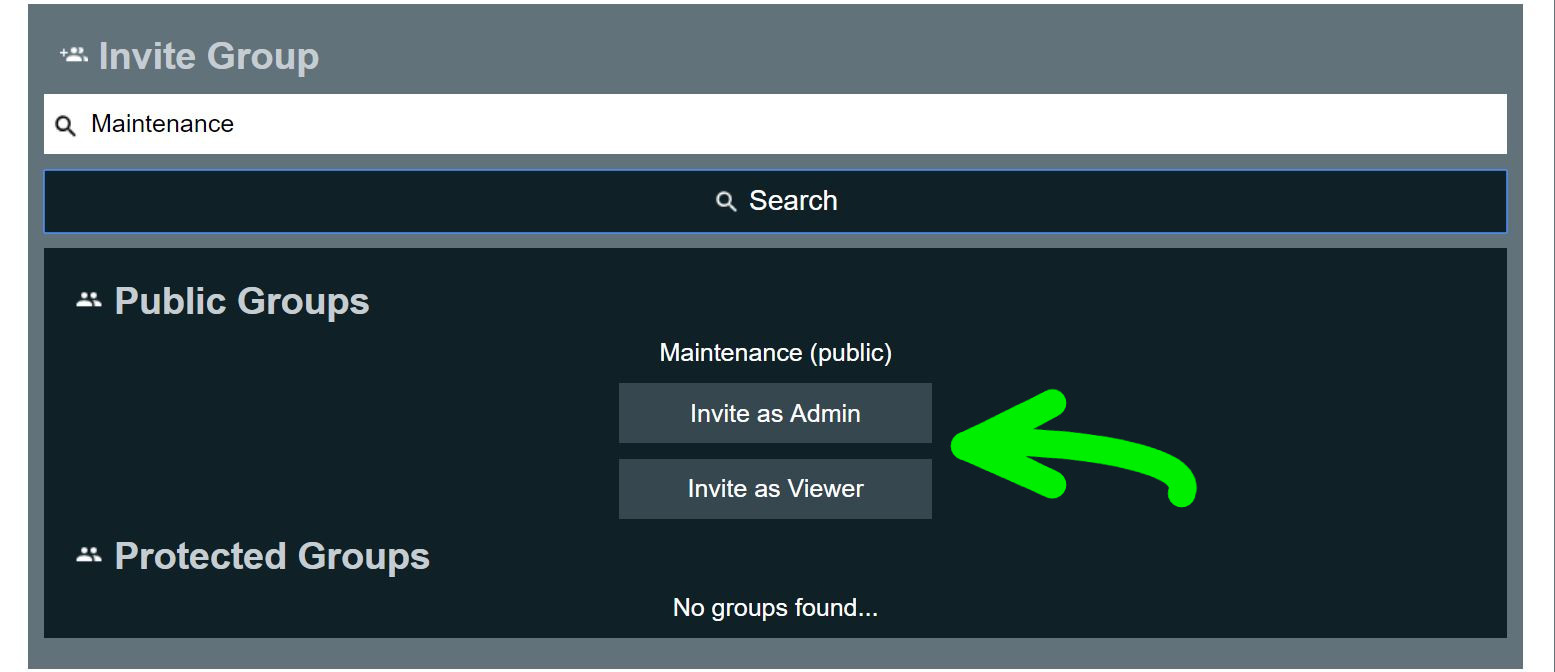
Step 6. Select the role
Select the role you want to give the group.
Accept a View Request
When another SkilFreek user wants to view one of your procedures, you'll receive a "View Request." Grant them access to your procedure by accepting the request.
Step 1. Procedures
From the Home page, go to Procedures.
Step 2. Select the procedure
On the Procedure page, select the procedure you want to check.
Step 3. Uncheck the Run box
Uncheck Run to view the requests.
Step 4. Scroll down
Scroll to the bottom of the page to see Groups that have access to this procedure area. Click Accept View Request.

Accept a Procedure Invite
If a SkilFreek user has cool skills to share with you, you'll receive a "Procedure Invite." Accept the invite to get access to the procedure.
Step 1. Procedure
From the Home page, go to Procedures.
Step 2. Select the group
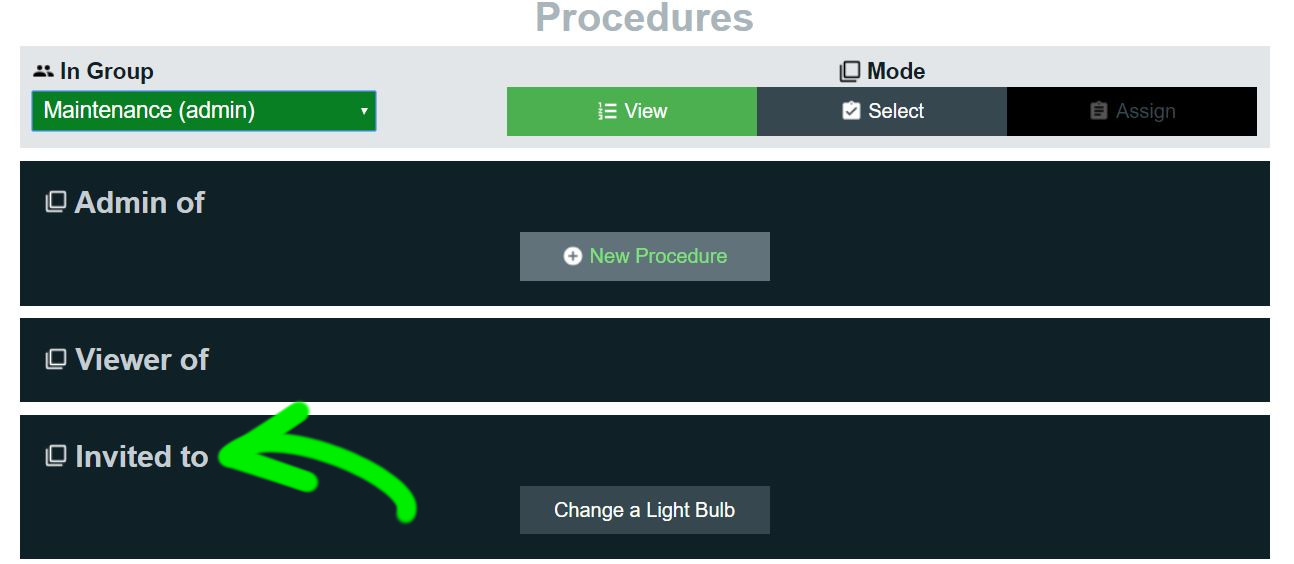
From the In Group list, select the group to which you were invited.

Step 3. Select the procedure
Scroll down to the Invited to area and select the procedure.
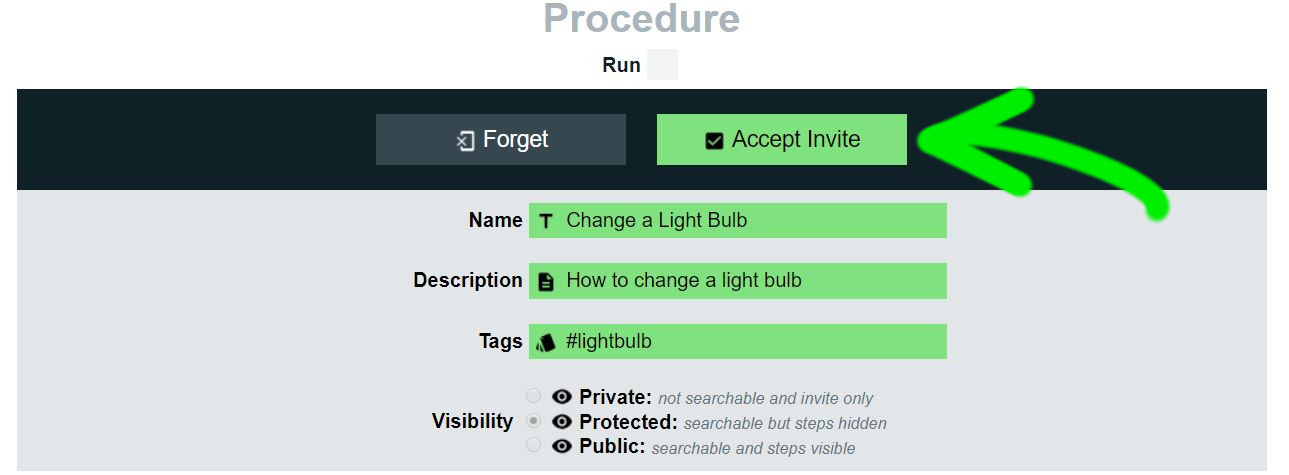
Step 4. Uncheck the Run box
Uncheck the Run box. Then, click Accept Invite.

Create a Group
You can create a SkilFreek group for anything — your family, friends or work colleagues.
Step 1. Groups
From the Home page, go to Groups.

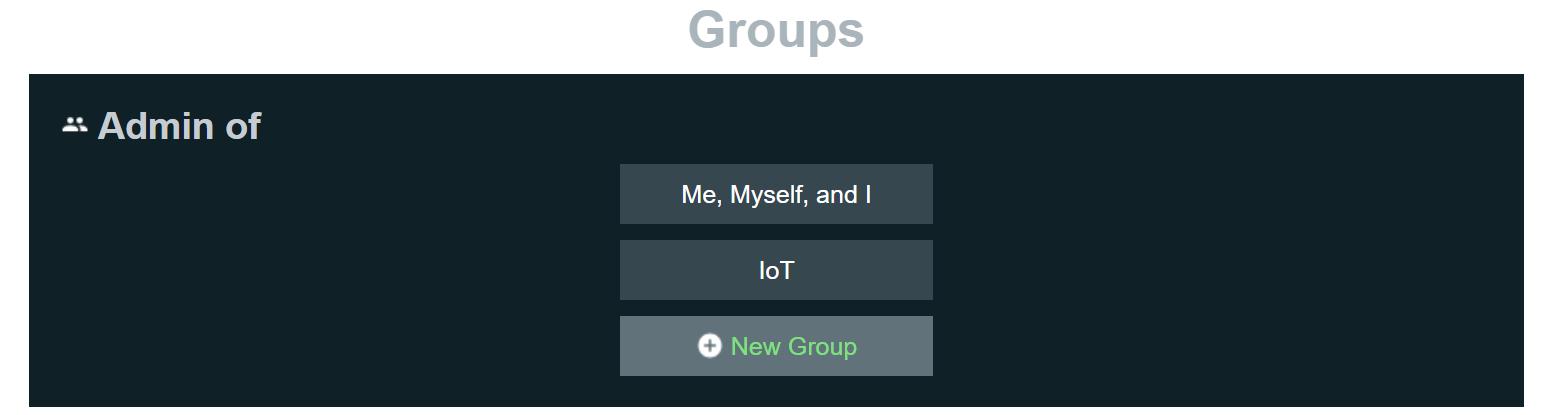
Step 2. My Groups
On the Groups page, click New Group.

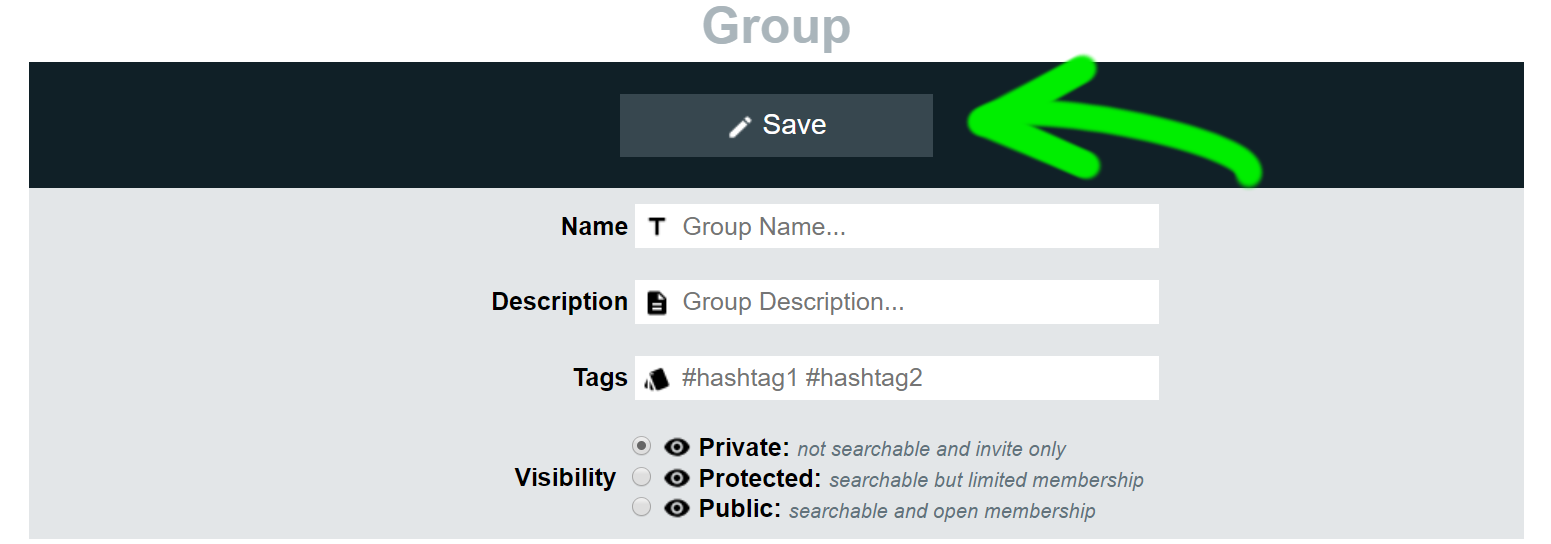
Step 3. Fill in the new group information
Give the new group a name, description, tags and visibility. Click Save.
Join a Group
Groups allow you to easily follow and share skills. The more SkilFreek groups you join, the more procedures you can learn!
Step 1. Groups
From the Home page, go to Groups.
Step 2. Join more
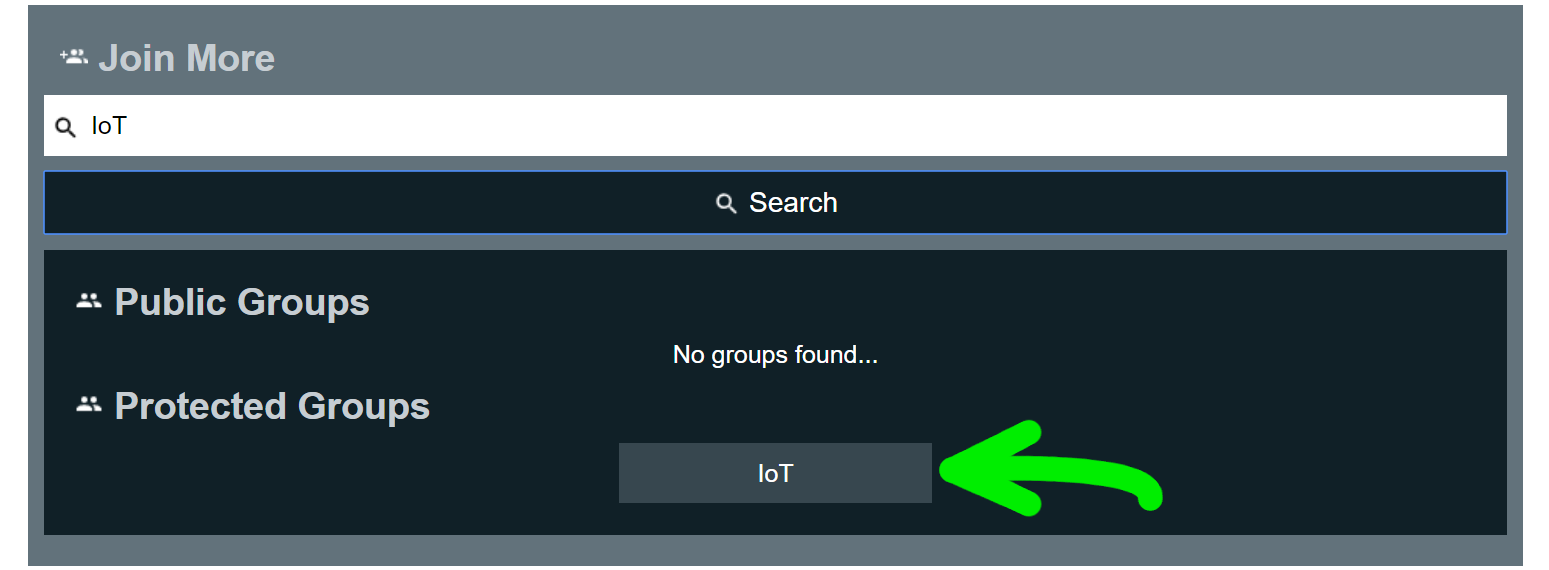
On the Groups page, scroll to the bottom of the page to the Join More area.

Step 3. Search the group
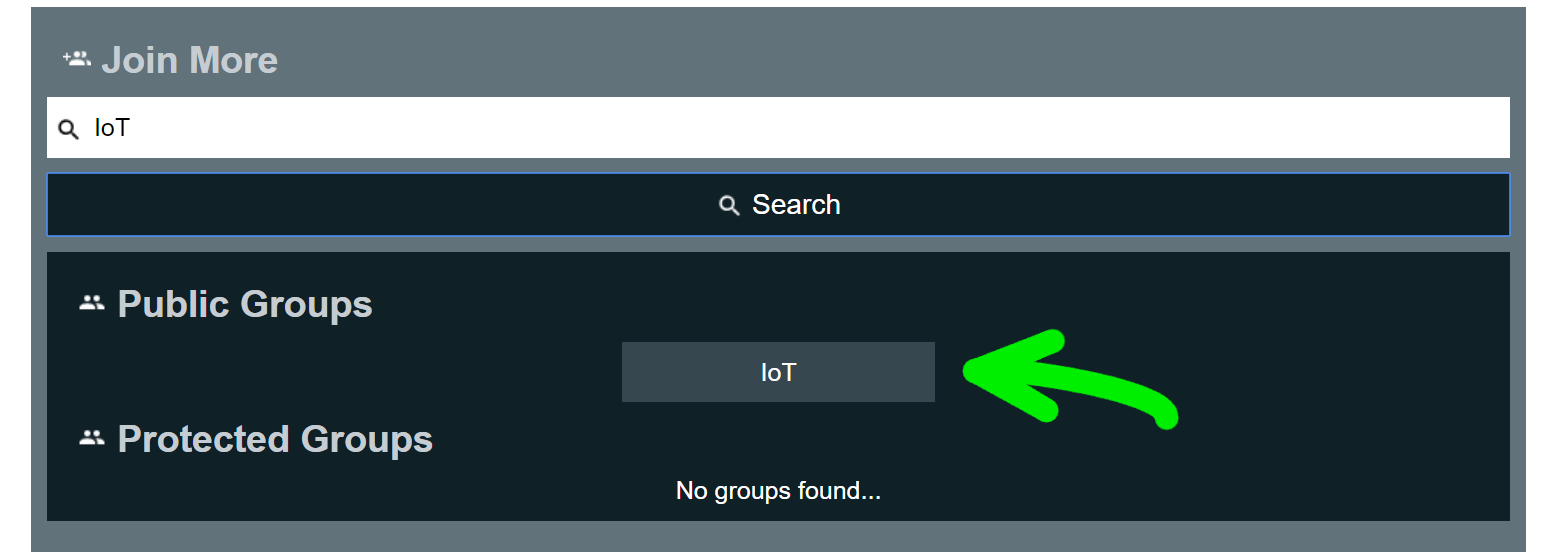
Type group tags you are interested in and click Search.

Step 4. Select the group: Public Group
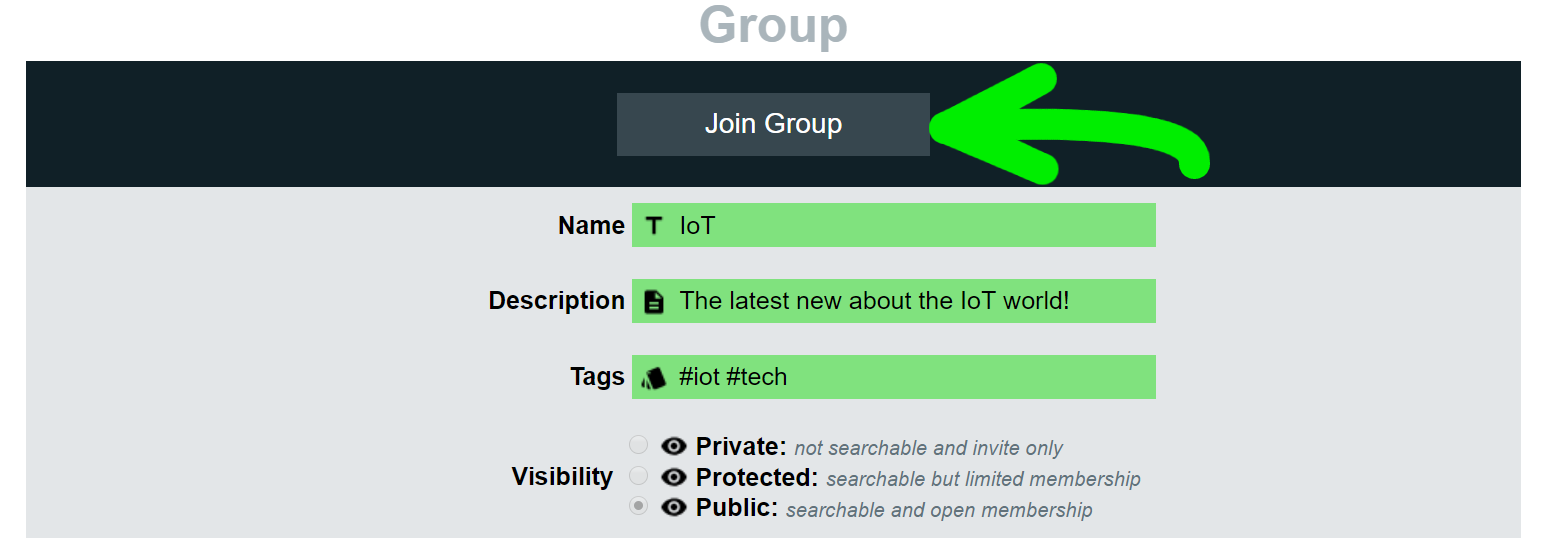
Select the public group you want to join.
Step 4.1. Join group
Click Join Group. Now you are part of a SkilFreek group!
Step 5. Select the Group: Protected Group
Select the protected group you want to join.
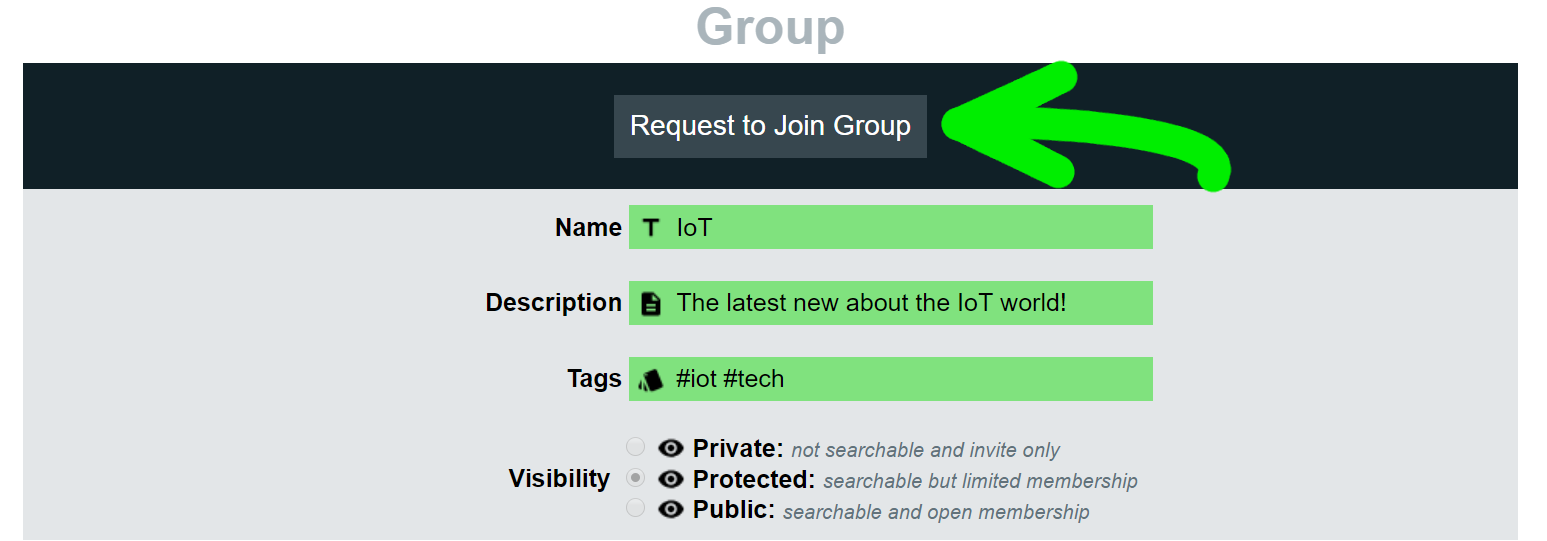
Step 5.1. Request to join group
Click Request to Join Group.
Step 5.2. Status of request
The group admin needs to accept your request. Once your request is accepted, the request will be move from Requested to join to Member of.


Invite to Group
Invite your family, friends, colleagues and employees to join your groups. They'll become experts of your procedures in no time!
Step 1. Groups
From the Home page, go to Groups.
Step 2. Select the group
On the Groups page, select the group to which you wish invite a user.
Step 3. Invite User
Scroll to the bottom of the page and enter the email address of the user you wish to invite. Click Search.

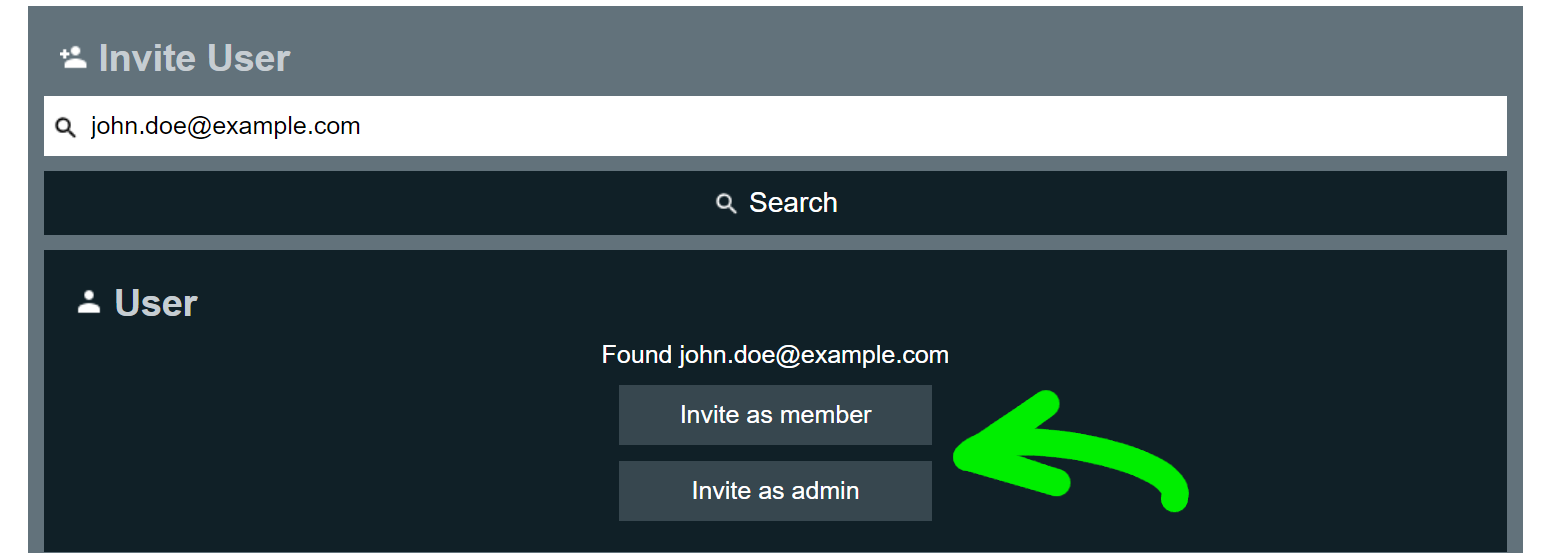
Step 4. Select the role
Select the role you want to give the user. Admins can modify the group's procedures and viewers can only read the group's procedures.
Accept a Request
To share your group’s unique skills with other interested users, accept their requests to join.
Step 1. Groups
From the Home page, go to Groups.
Step 2. Select the group
On the Groups page, select the group to check for pendings requests to join.
Step 3. Accept the request
Scroll down to the Users in Group area. Click Accept Member Request.

Accept a Invite
Accept invitations to join other groups to ensure you don’t miss out on new and relevant skills!
Step 1. Groups
From the Home page, go to Groups.
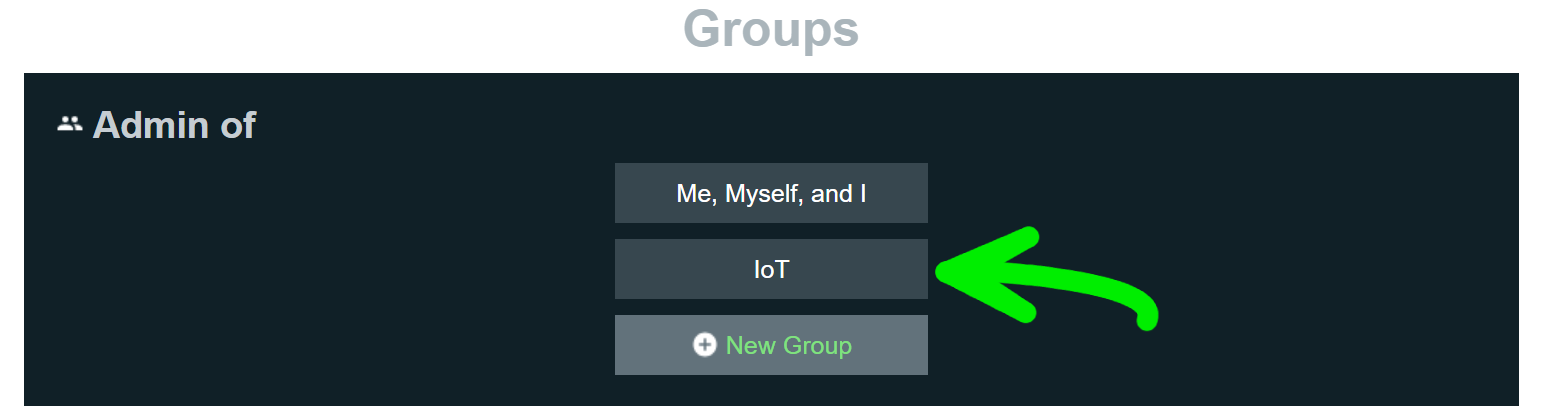
Step 2. Invites
Scroll to the bottom of the page to the Invited to area. Select the group to which you were invited.

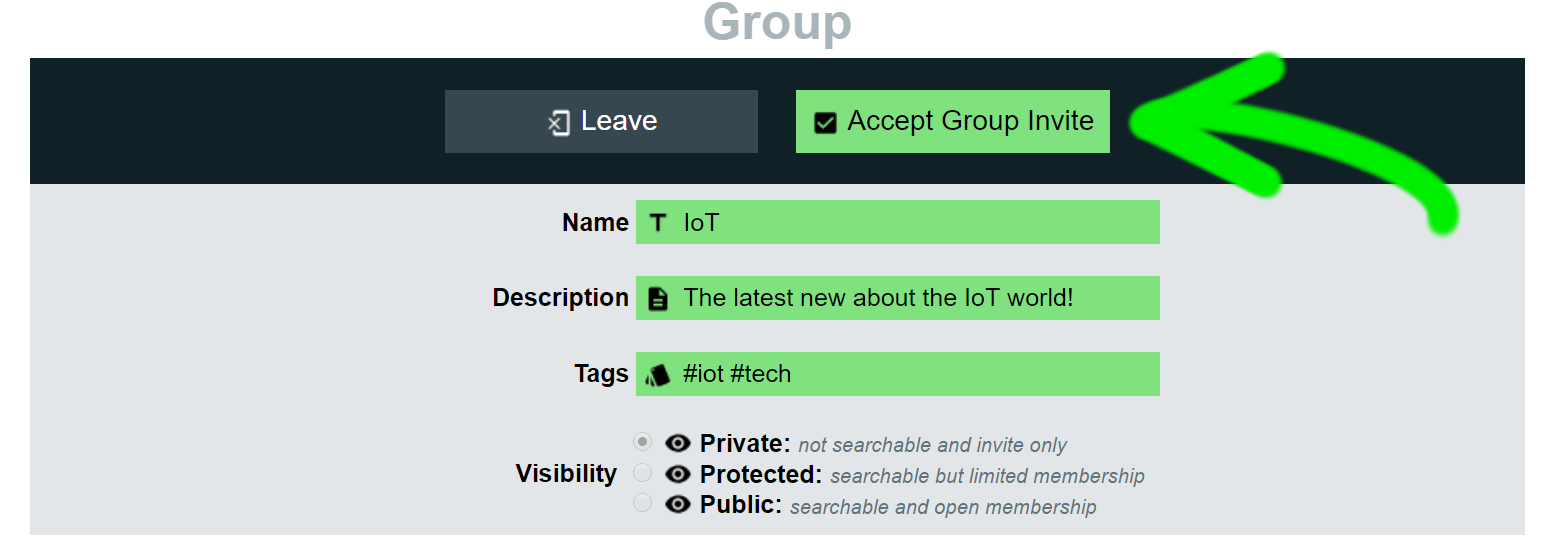
Step 3. Accept the group invite
Click Accept Group Invite. Now you're a member of a SkilFreek group!

Create an Assignment
With SkilFreek assignments, manage your workforce with a new level of productivity. Effortlessly assign tasks to be completed by a specific date and time; then validate the tasks are completed correctly and on-time!
Step 1. Procedures
From the Home page, go to Procedures.
Step 2. Select a group
From the In Group list, select the group that contains the procedure and user to assign.
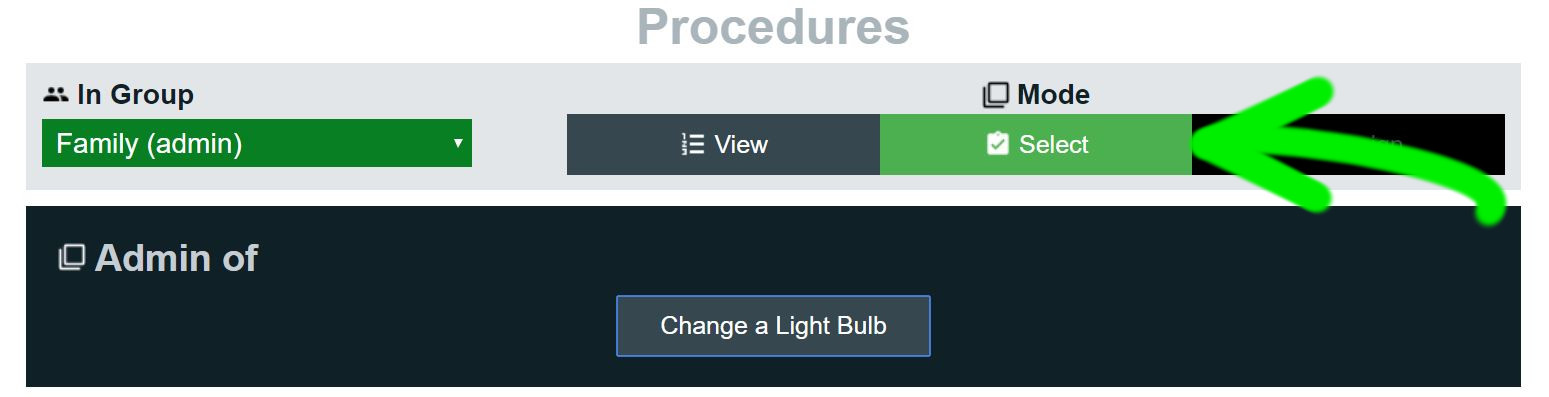
Step 3. Procedure Select Mode
Click the Select mode to be able to select one or more procedures.
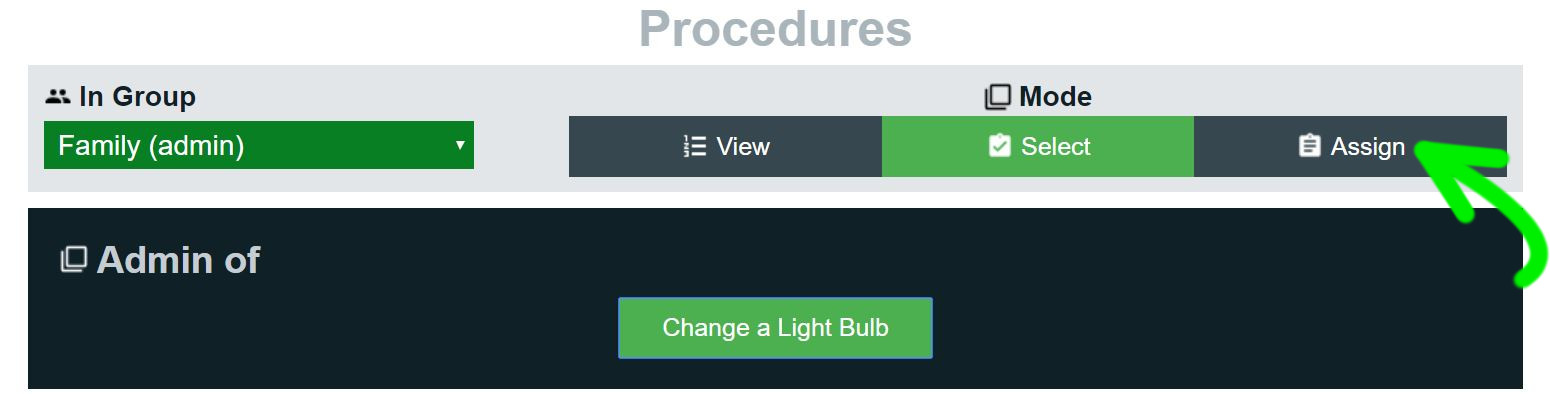
Step 4. Assign
Select one or more procedures to assign to.
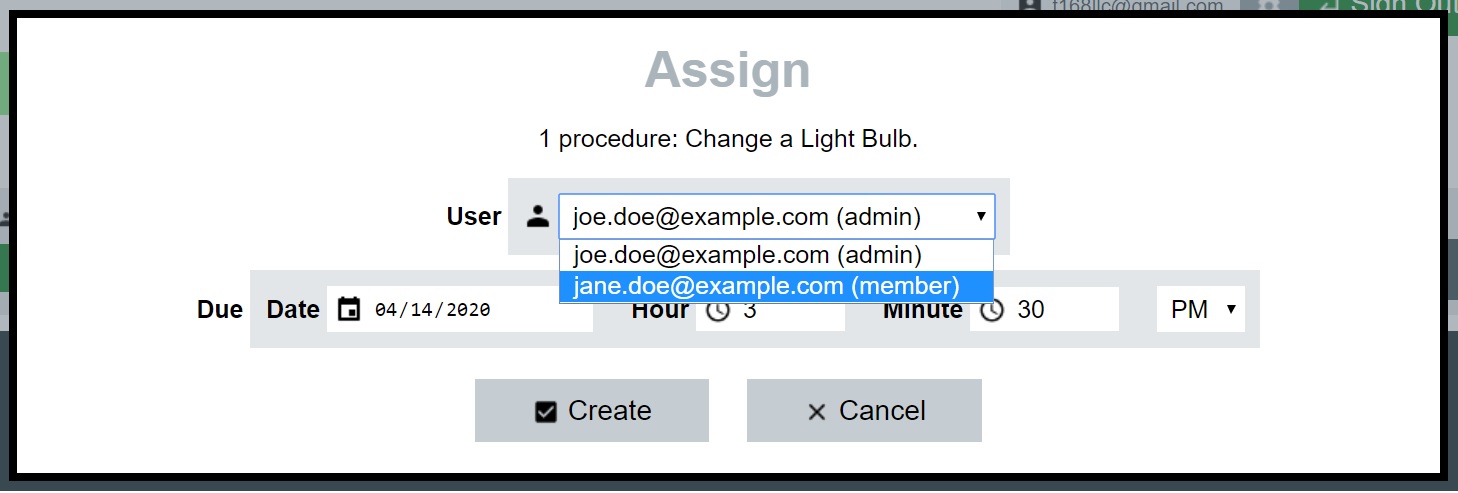
Step 5. Create assignment
Fill out the assignment properties: choose a user for the assignment and set a due date. Click Create.
Step 6. Manage assignments
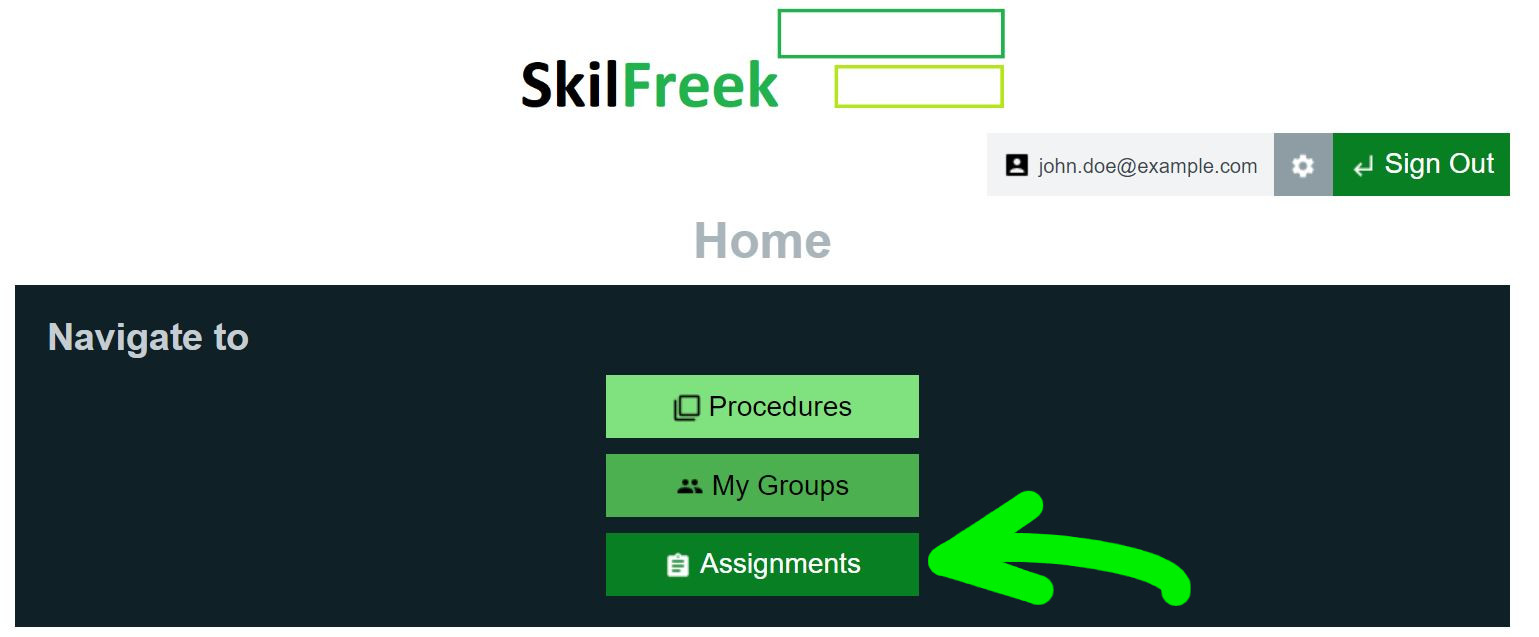
From the Home page, click Assignments.
Step 7. Review assignments
At any time, you can review and follow up on the assignments given.

Complete an Assignment
Work smarter, not harder. Meet work deadlines and impress your boss by completing your SkilFreek assignments.
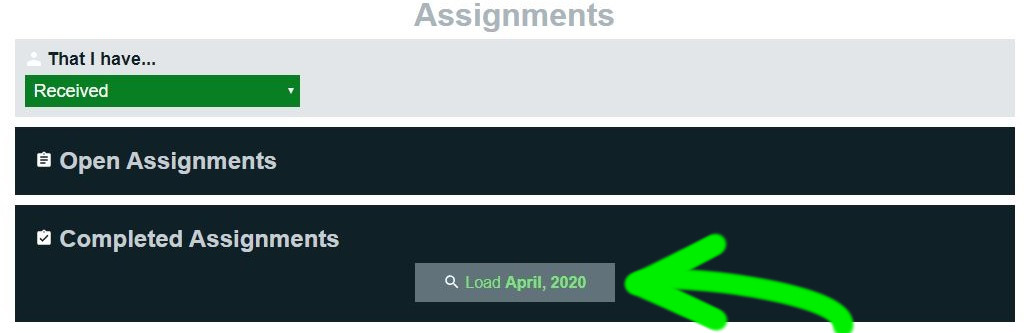
Step 1. Assignments
From the Home page, go to Assignments.
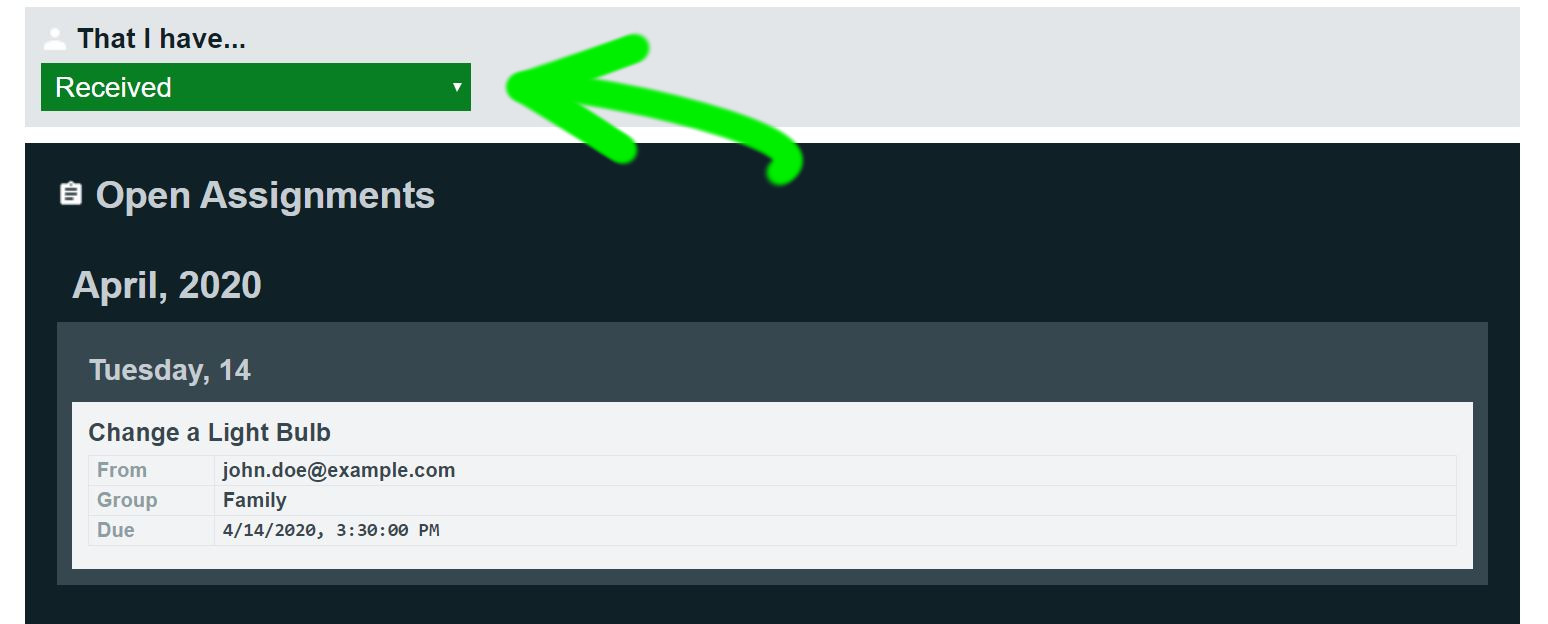
Step 2. Check your assignments
Select your assignments Received. Click the assignment to view the assigned procedure.
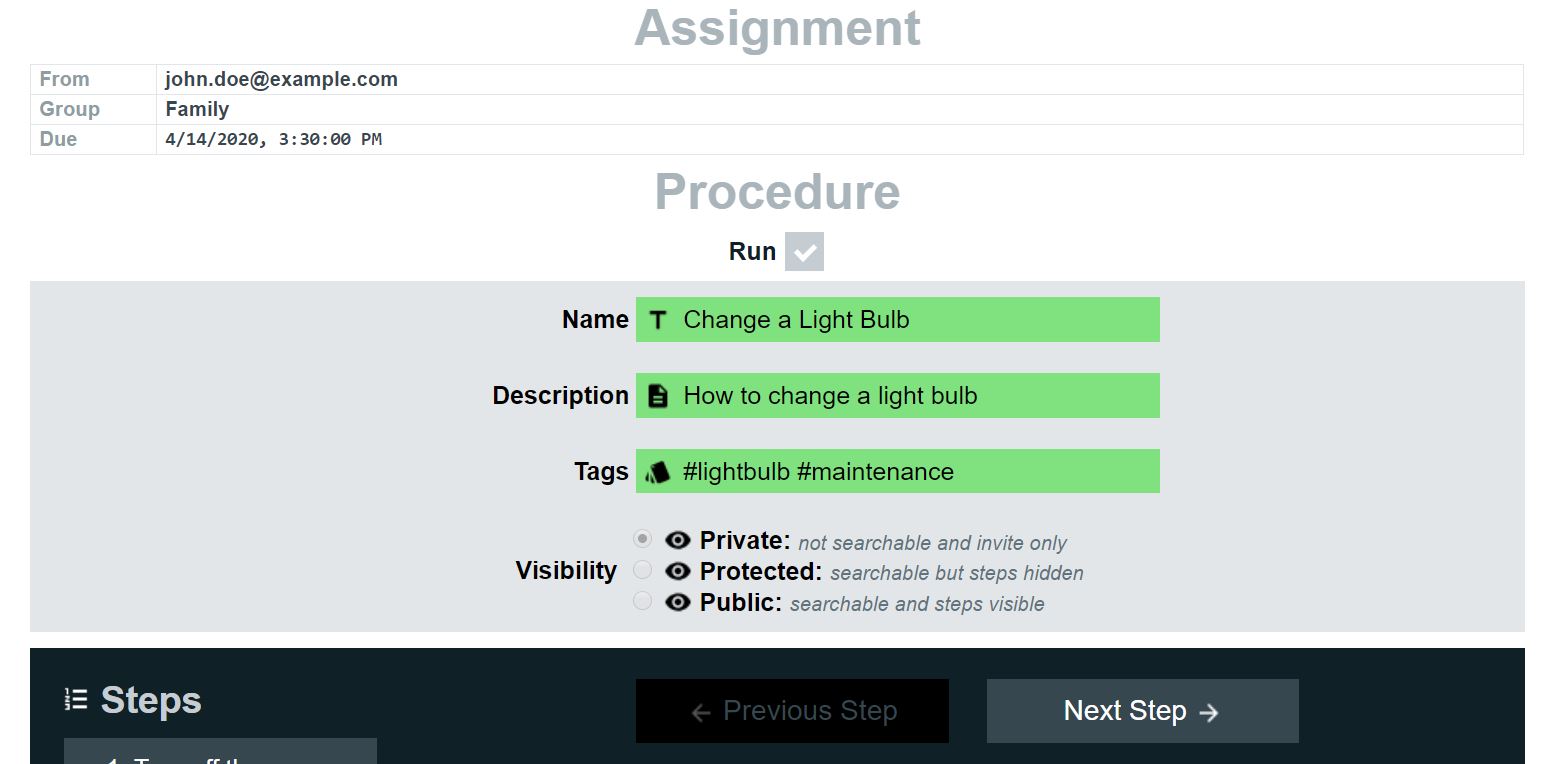
Step 3. Follow the procedure
Complete every step.
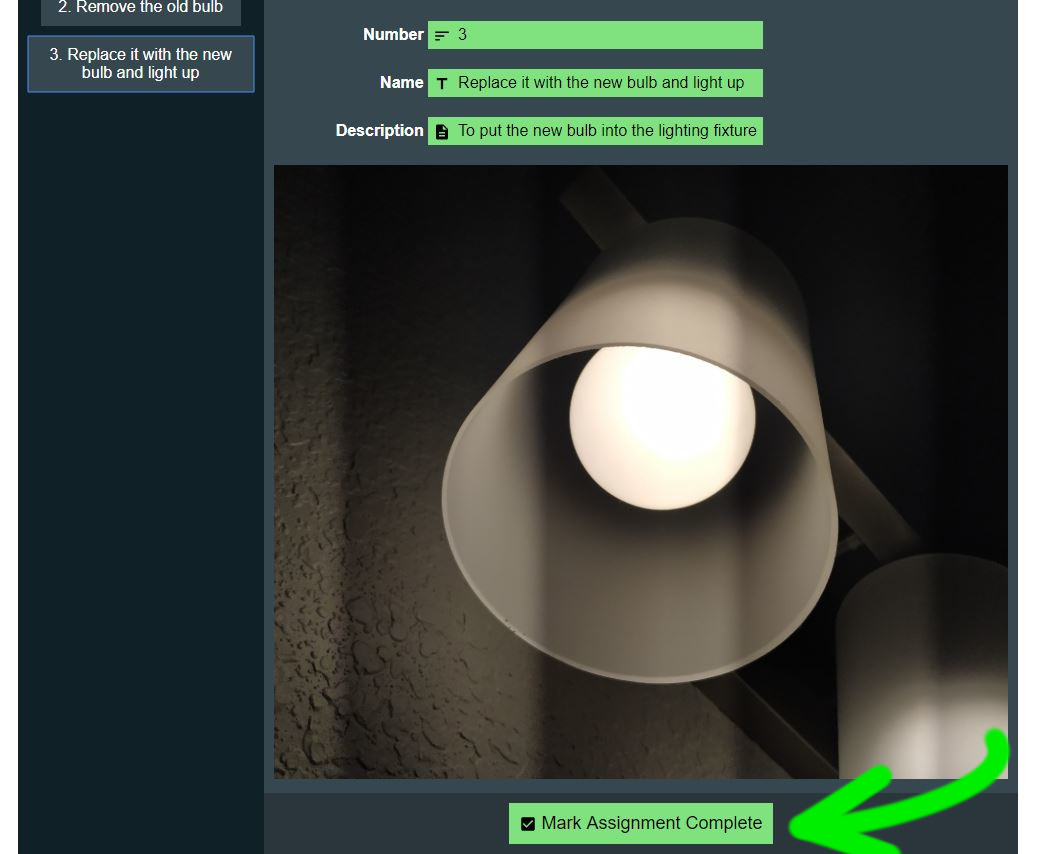
Step 4. Complete the assignment
Once you are done with the assignment, click Mark Assignment Complete.
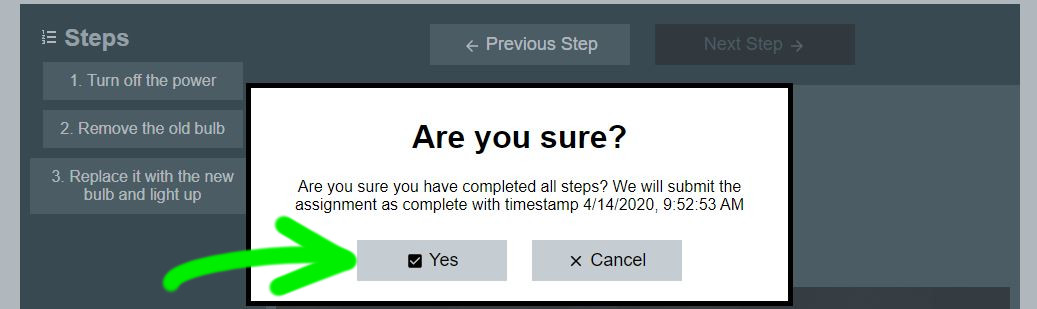
Step 5. Confirm the assignment completion
If you have completed all steps, click Yes.
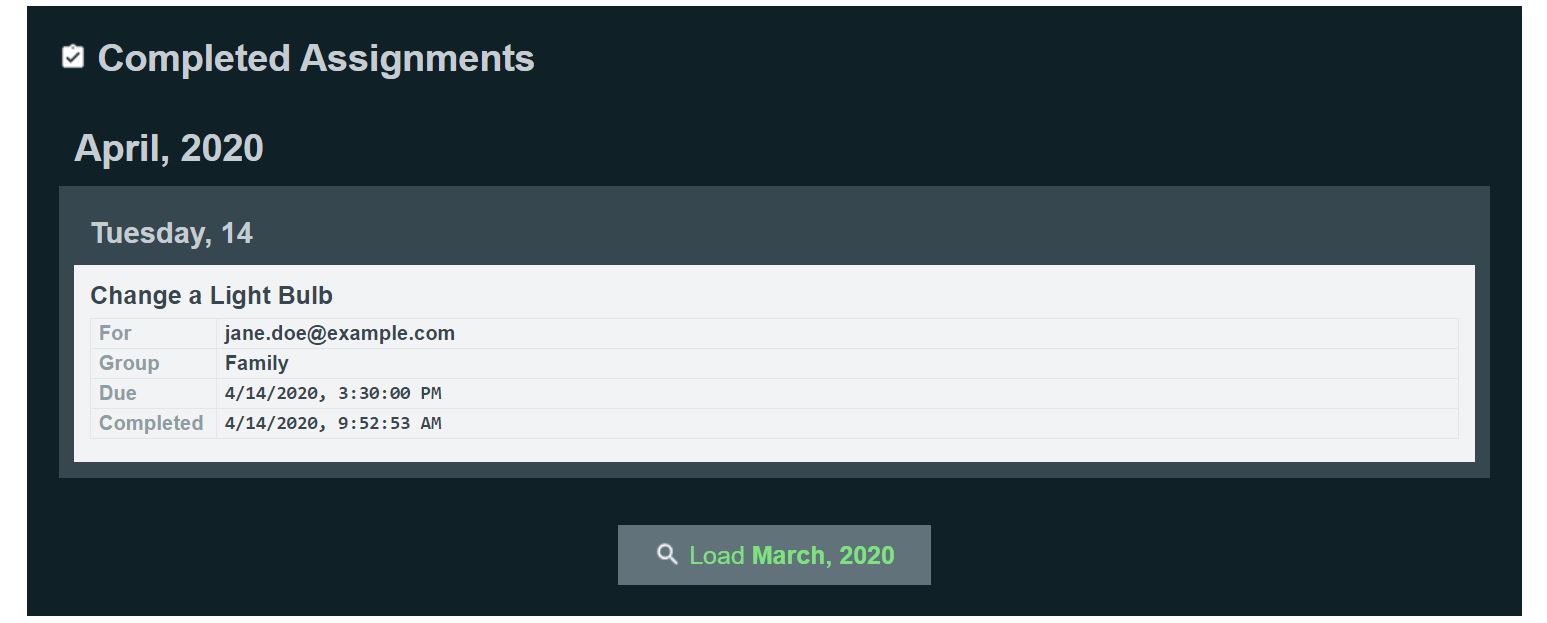
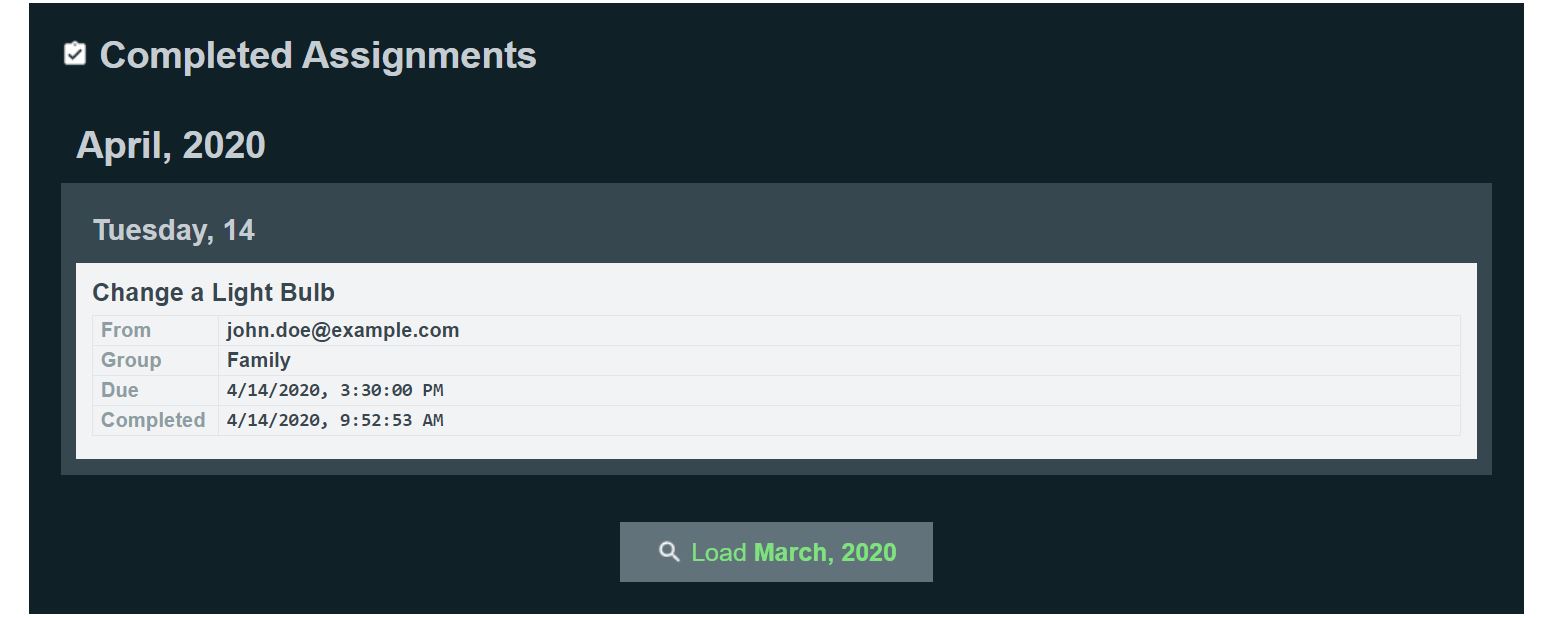
Step 6. Follow up on completed assignments
Click Load to view the completed assignments month by month.
Get a Subcription
Want to unleash the power of productivity? Gain access to assignments and track your team's work remotely by subscribing to a plan.
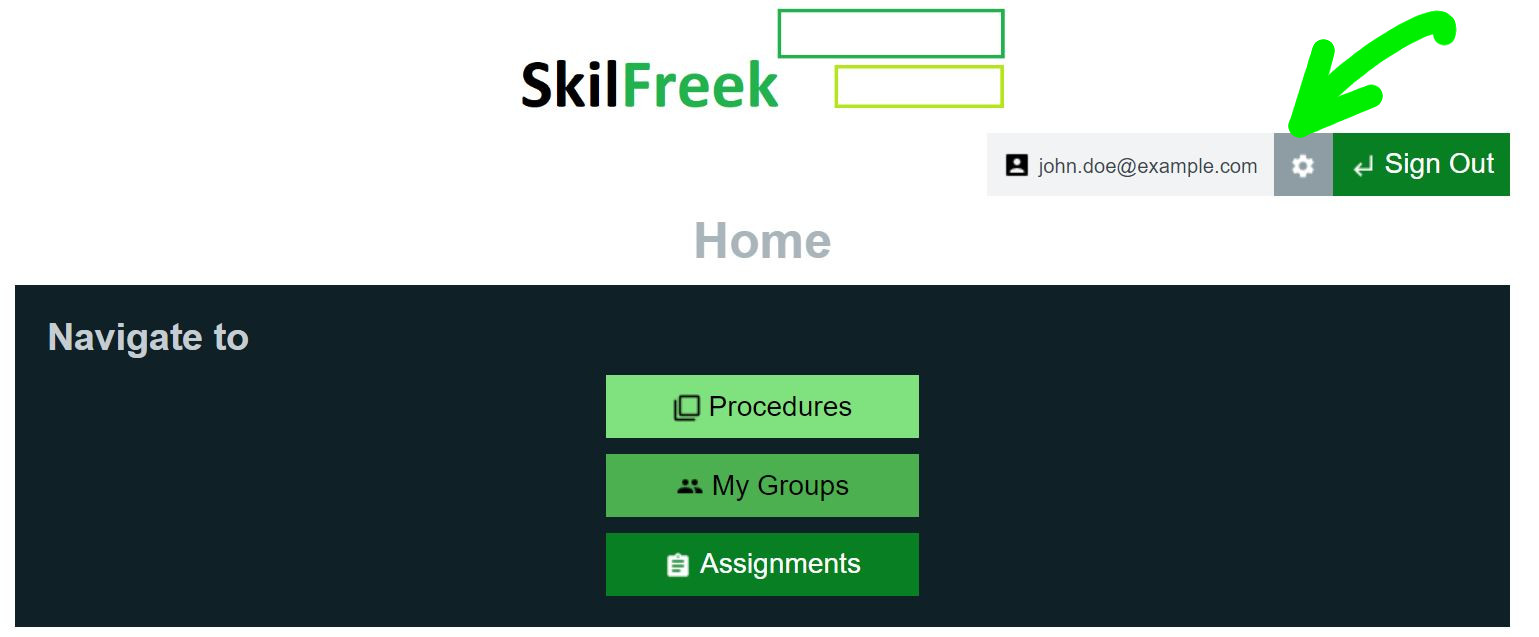
Step 1. Settings
From the Home page, go to Settings, located next to the Sign Out button.
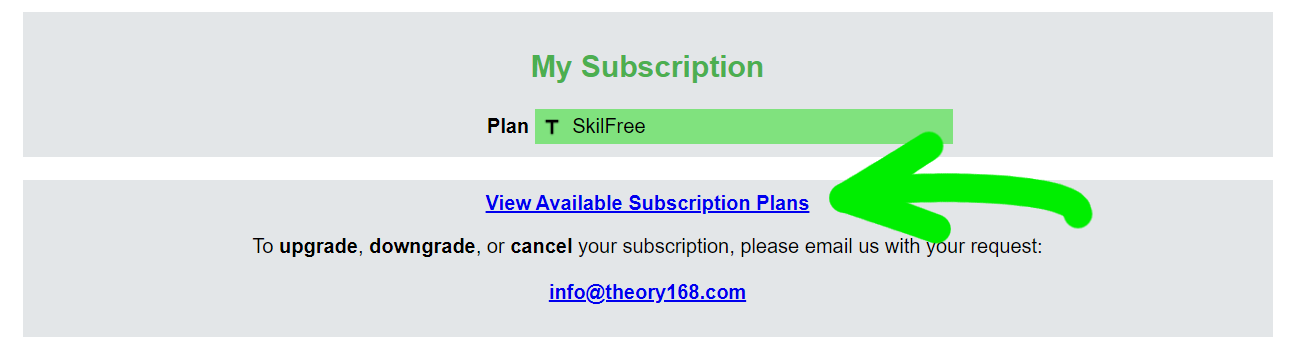
Step 2. My subscription
On the Settings page, go to My Subscription and click View Available Subscription Plans.
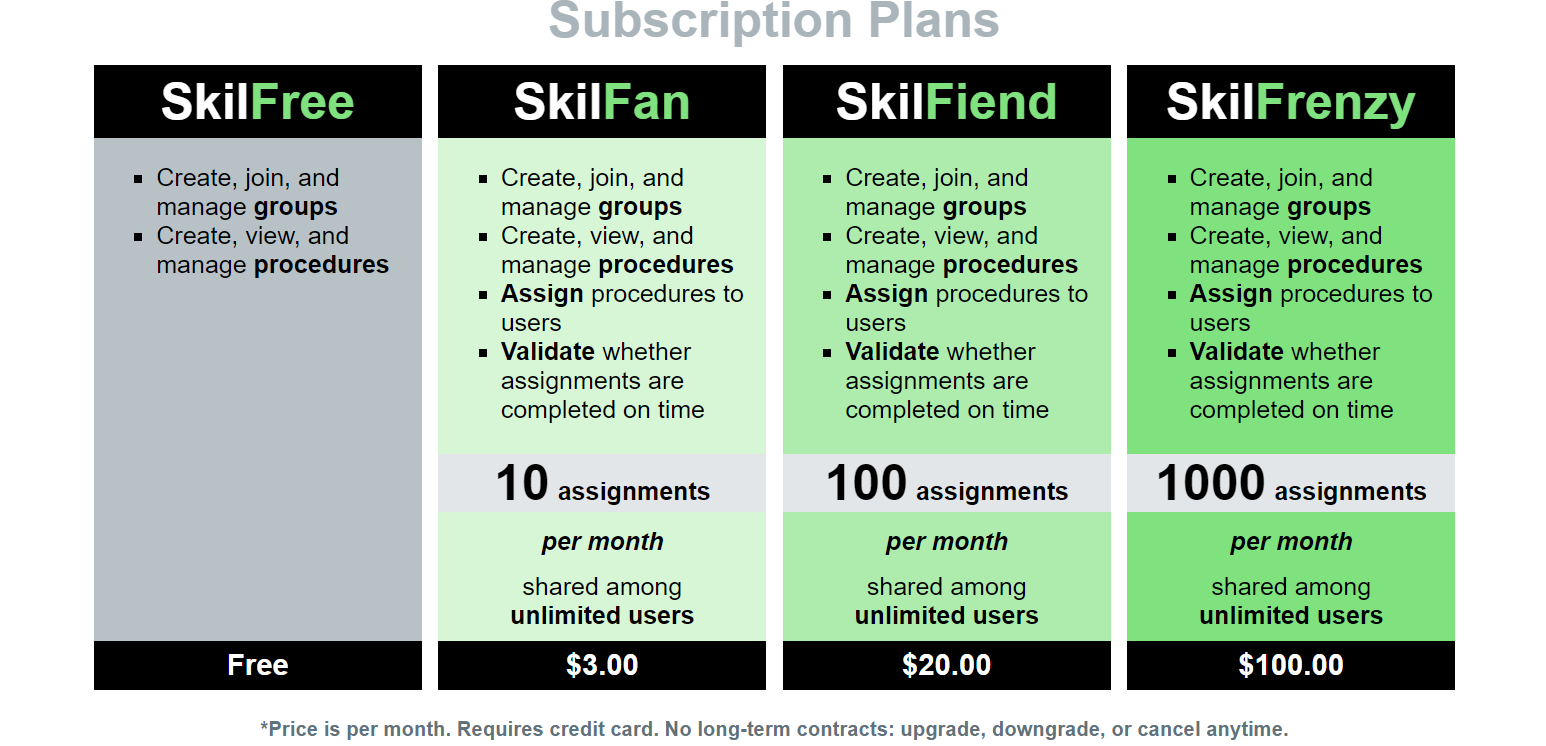
Step 3. Select a subscription plan
Click the subscription plan you wish to get.
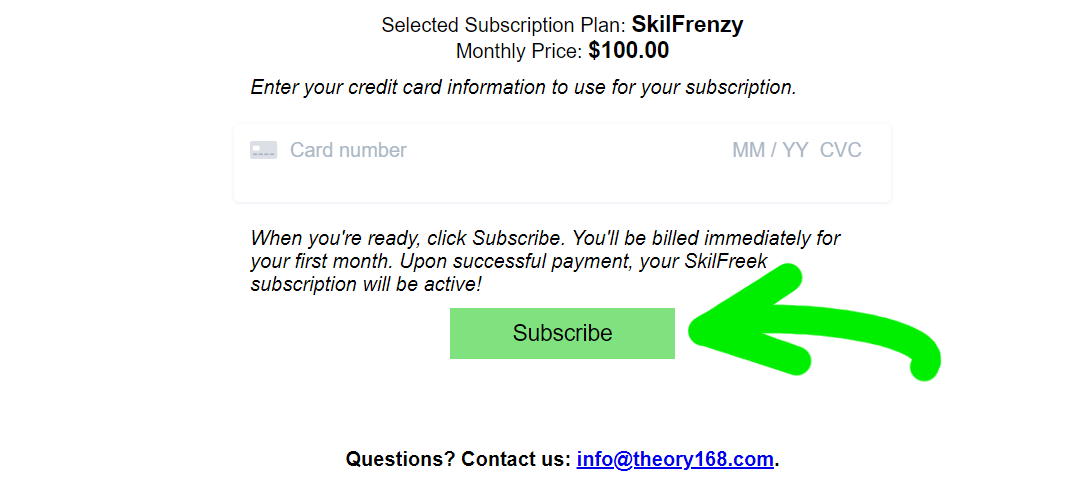
Step 4. Enter the payment information
Enter your card information and click Subscribe. Once the payment is confirmed, your subscription will be active, and you will have access to create assignments with SkilFreek!
Share a Subcription
Sharing is caring! Share your SkilFreek subscription plan with other users.
Step 1. Settings
From the Home page, go to Settings, located next to the Sign Out button.
Step 2. Share your Subscription
On the Settings page, scroll to the bottom of the page to Share Subscrition.

Step 3. Enter the user's email
Enter the email address of the user with which you want to share your subscription. Click Search.

Step 4. Add user to subscription
Click Add User to Subscription.

Manage your Subcription
Maximize your subscription by keeping track of your monthly assignments and all users sharing the subscripton.
Step 1. Settings
From the Home page, go to Settings, located next to the Sign Out button.
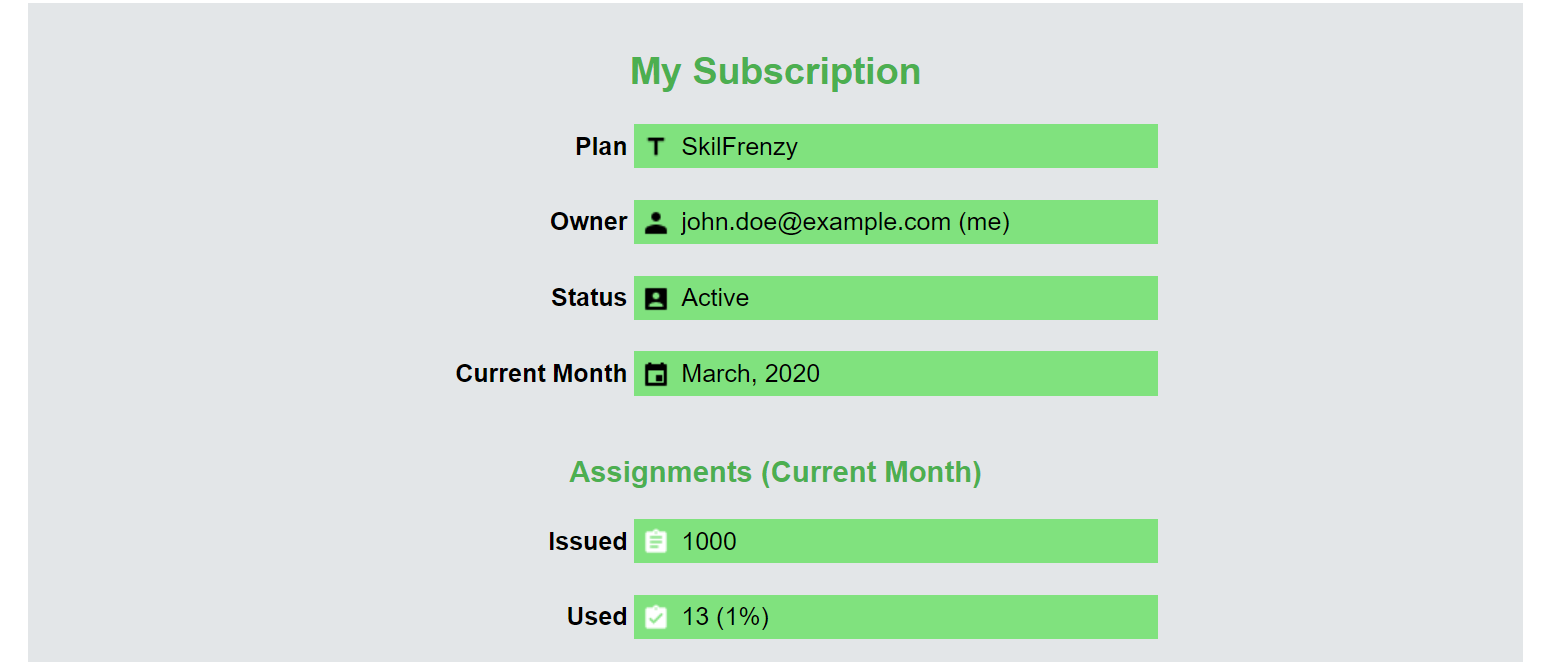
Step 2. Subscription status
On the Settings page, go to My Subscription to check the plan name, owner, status and current month. Also, you can track the current month's allocation and usage of assignments.
Step 3. Remove a user from subscription
Scroll down to the Users Sharing this Subscription area. Select the user you want to remove, and click Remove User.
